


[Medium Roast]How to Brew Drip Coffee – Guide to Bring Out Natural Sweetness
最終更新日: 2026/05/19

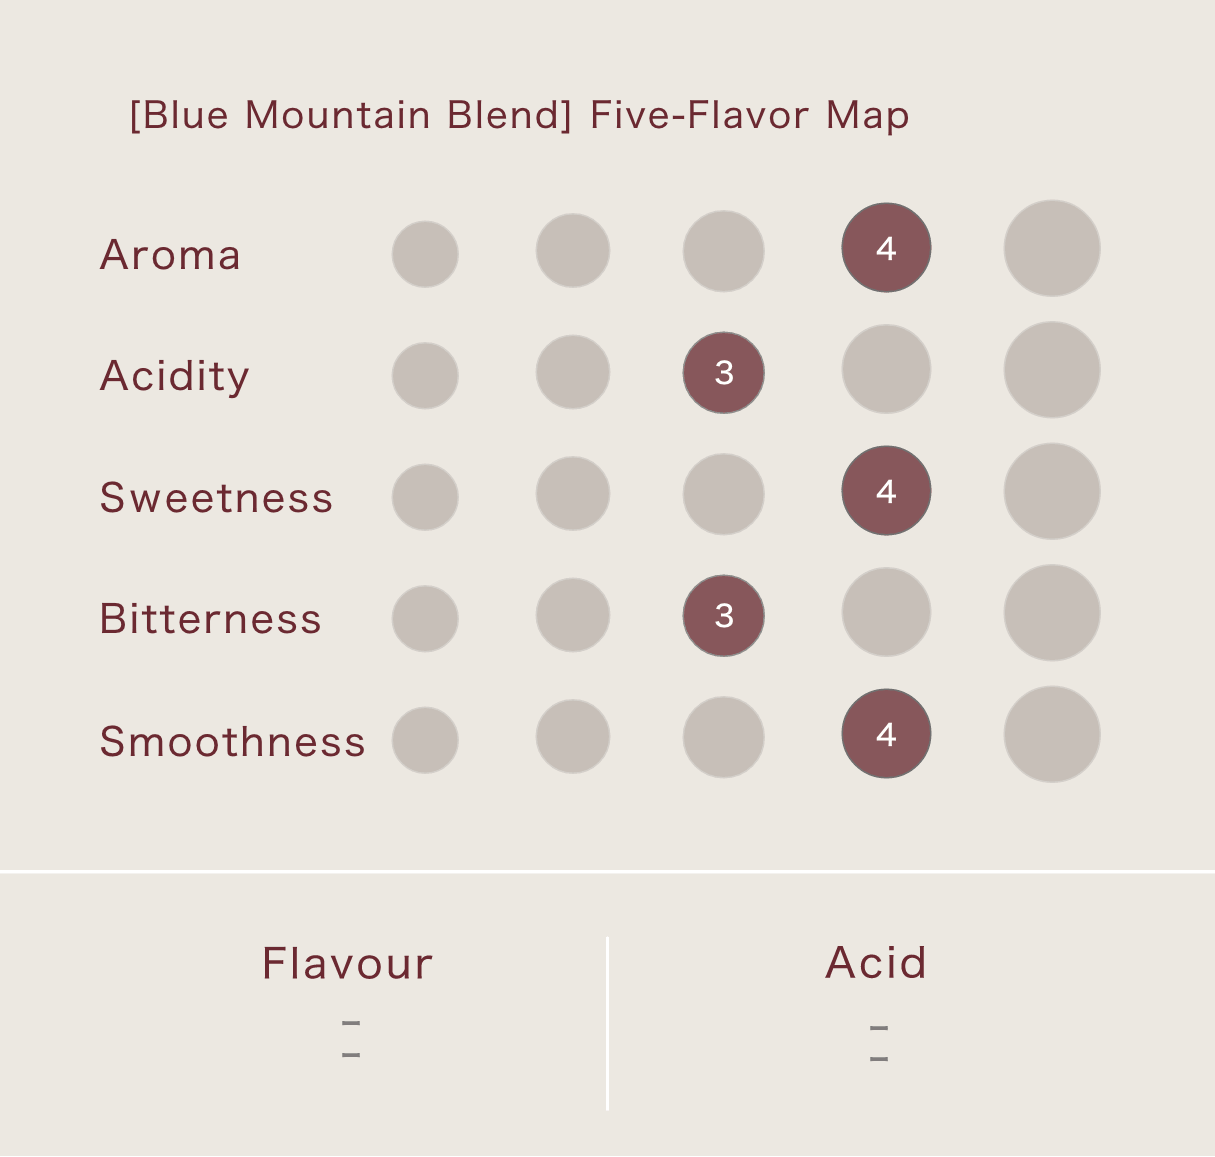
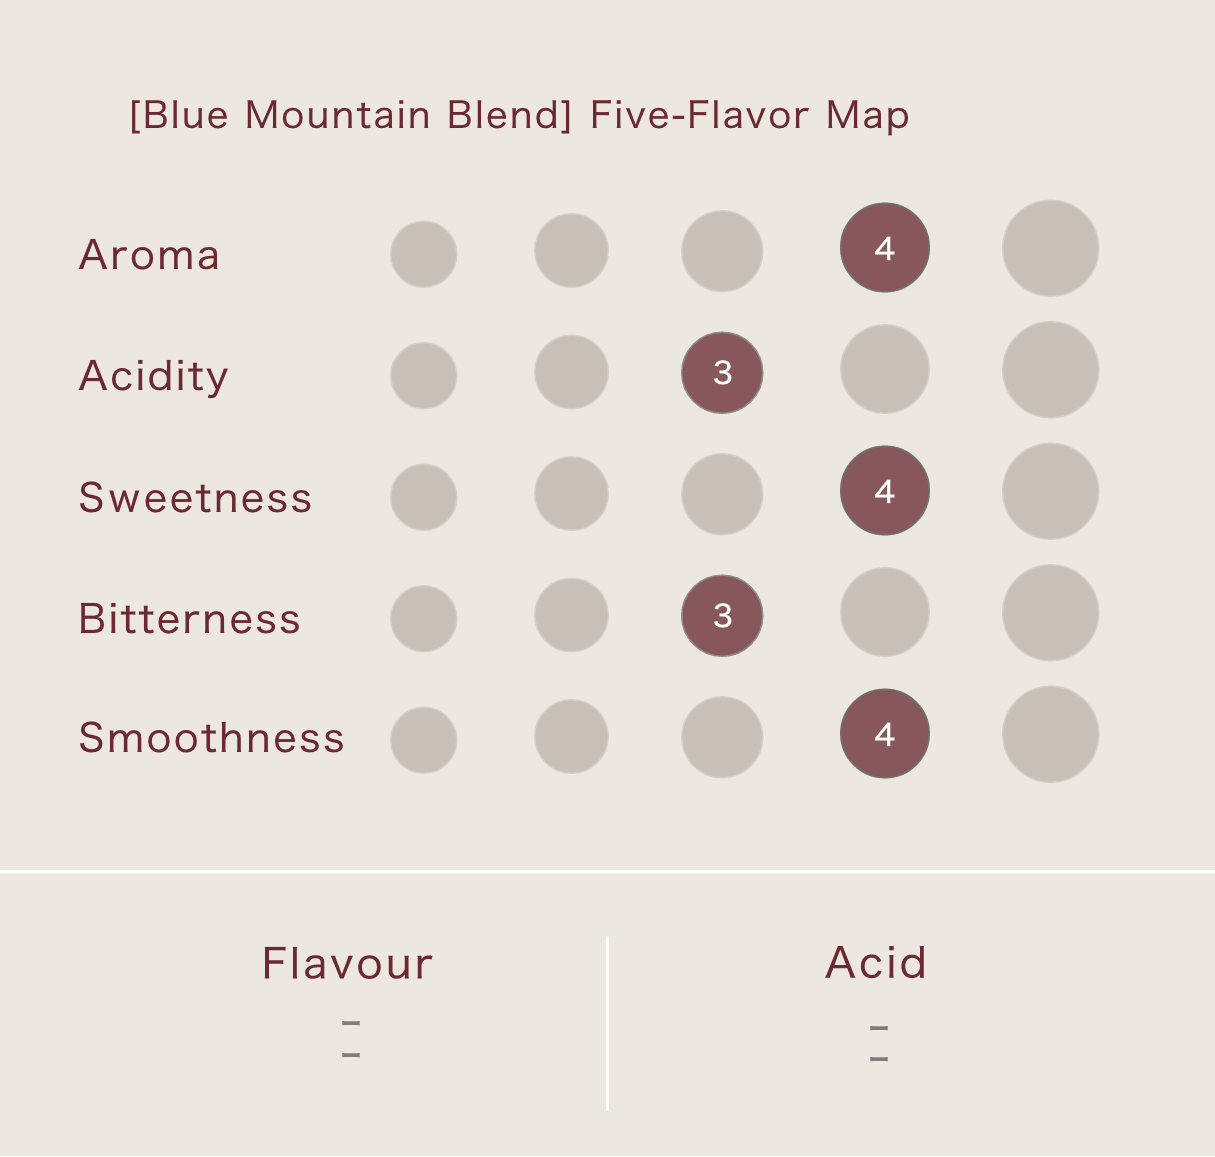
Medium roast coffee offers a wide range of balanced flavors.
At this roast level, acidity, sweetness, aroma, and body appear in various ways.
This article explains how to make drip coffee that brings out the rich sweetness and body characteristic of medium roast coffee.
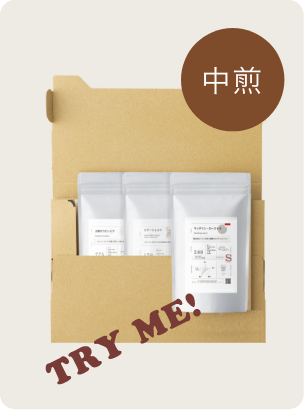
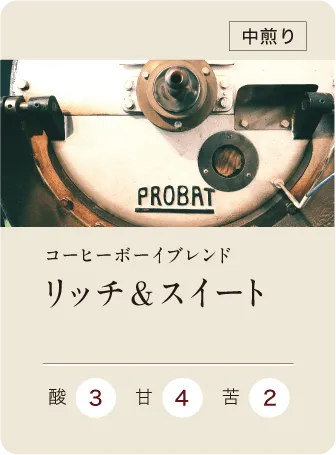
Beans Used: Representative Medium Roast — Blue Mountain Blend
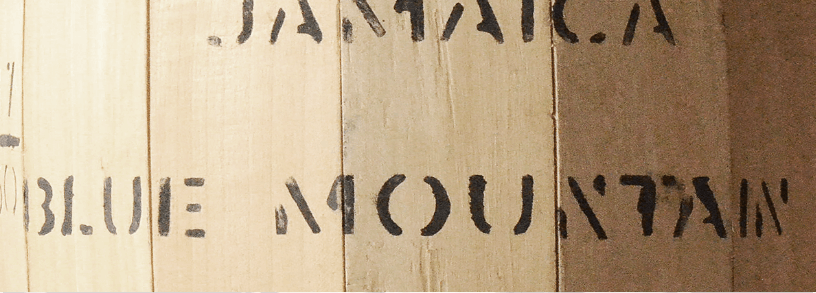
We use COFFEEBOY’s Blue Mountain Blend, a medium roast with excellent flavor balance that lets you enjoy a variety of nuances.
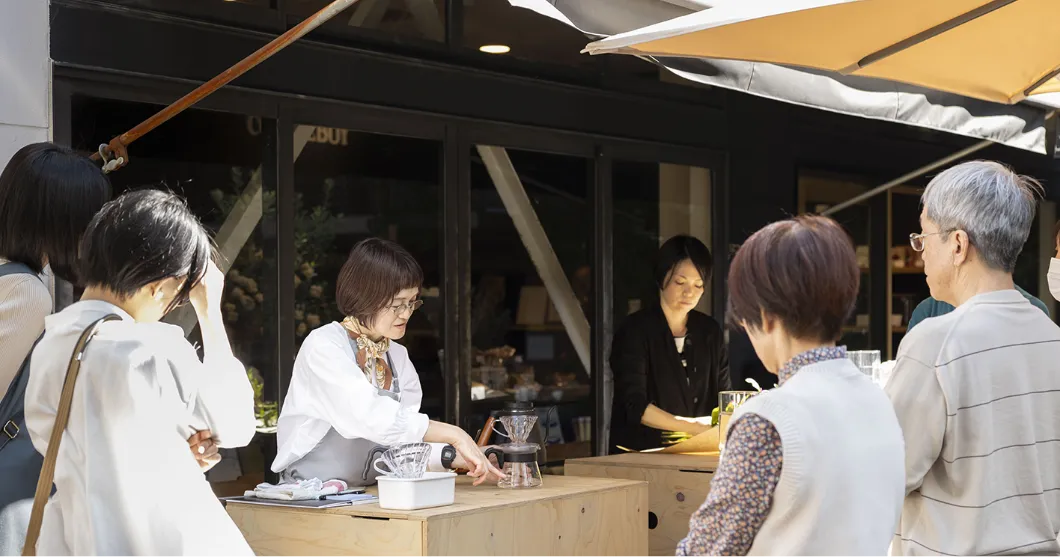
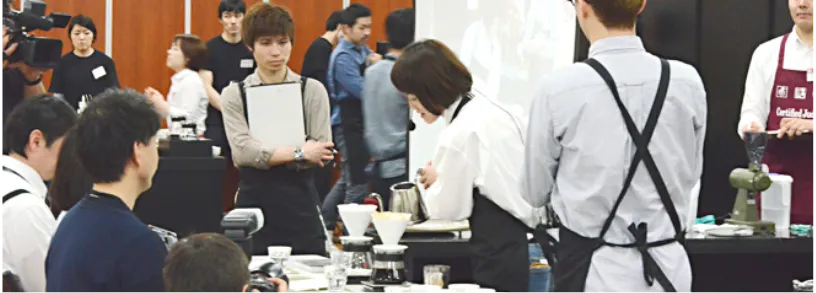
Supervised by Masami Morimoto, Store Manager — Finalist of the Japan Hand-Drip Championship 2017
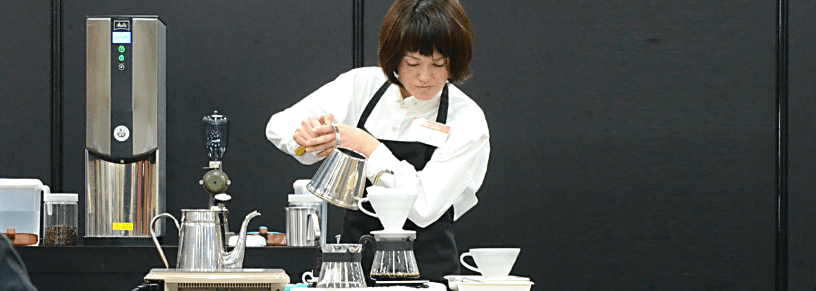

The first step to delicious drip coffee is being mindful of bean amount, grind size, water volume, and temperature. I hope this recipe helps you take your first step into hand-drip coffee. — Masami Morimoto, Hikari Store Manager
Let’s brew a delicious cup of medium roast drip coffee.
Contents
1. Medium Roast Level and Characteristics
2. Drip Coffee Recipe MAP (Medium Roast)
3. Coffee and Water Amount, Grind Size, and Temperature
4. Brewing Steps — First Pour / Bloom
5. Second Pour — Flavor Development
6. How to Brew Medium Roast Drip Coffee:
Third and Fourth Pours –Strength Adjustment
7. How to Bring Out Sweetness and Body
8. A Message from the Barista & Summary
1. Medium Roast Level and Characteristics
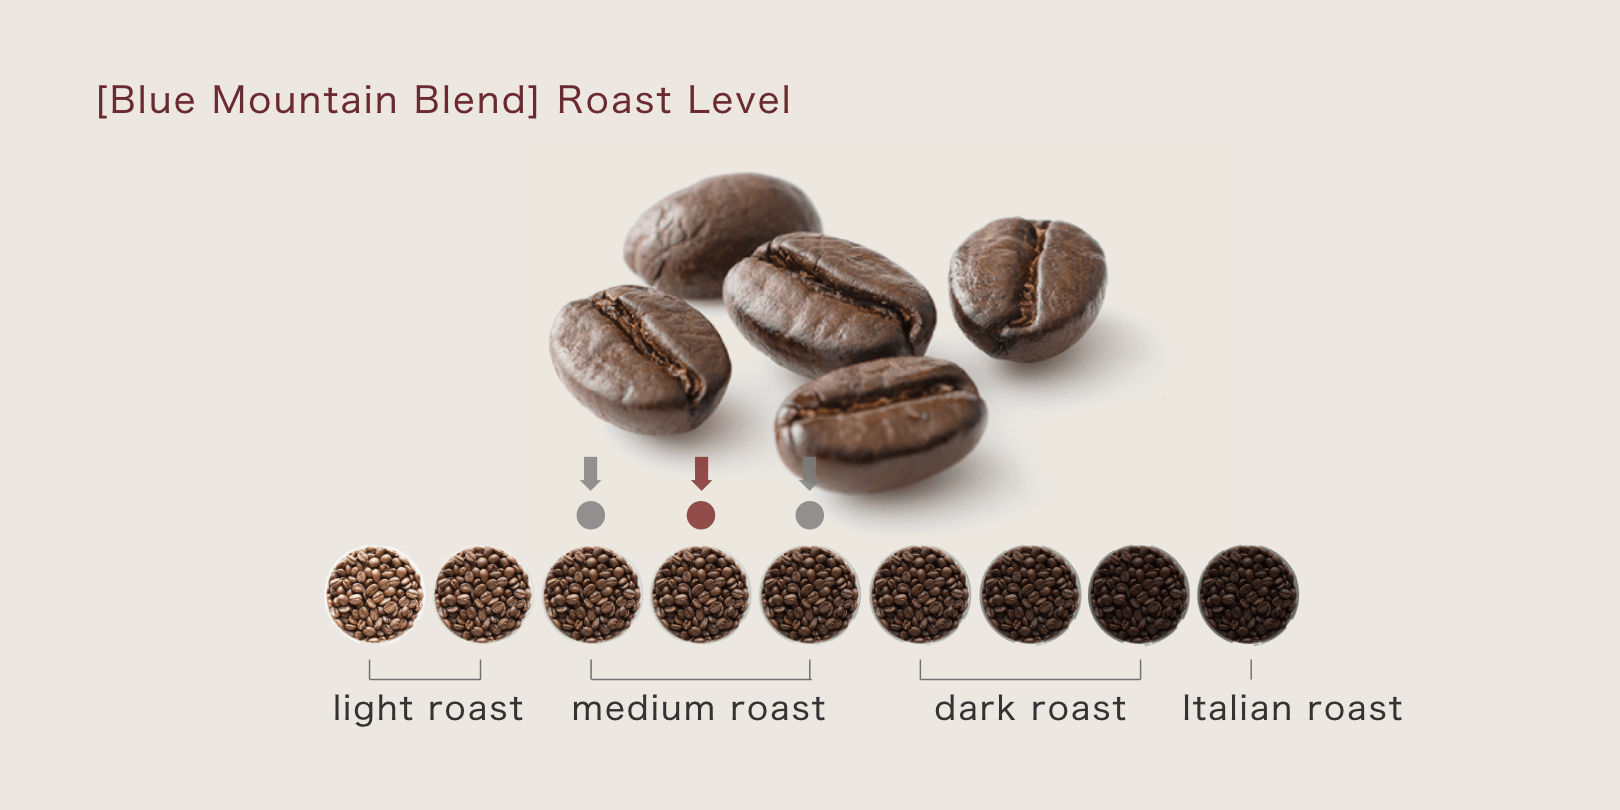
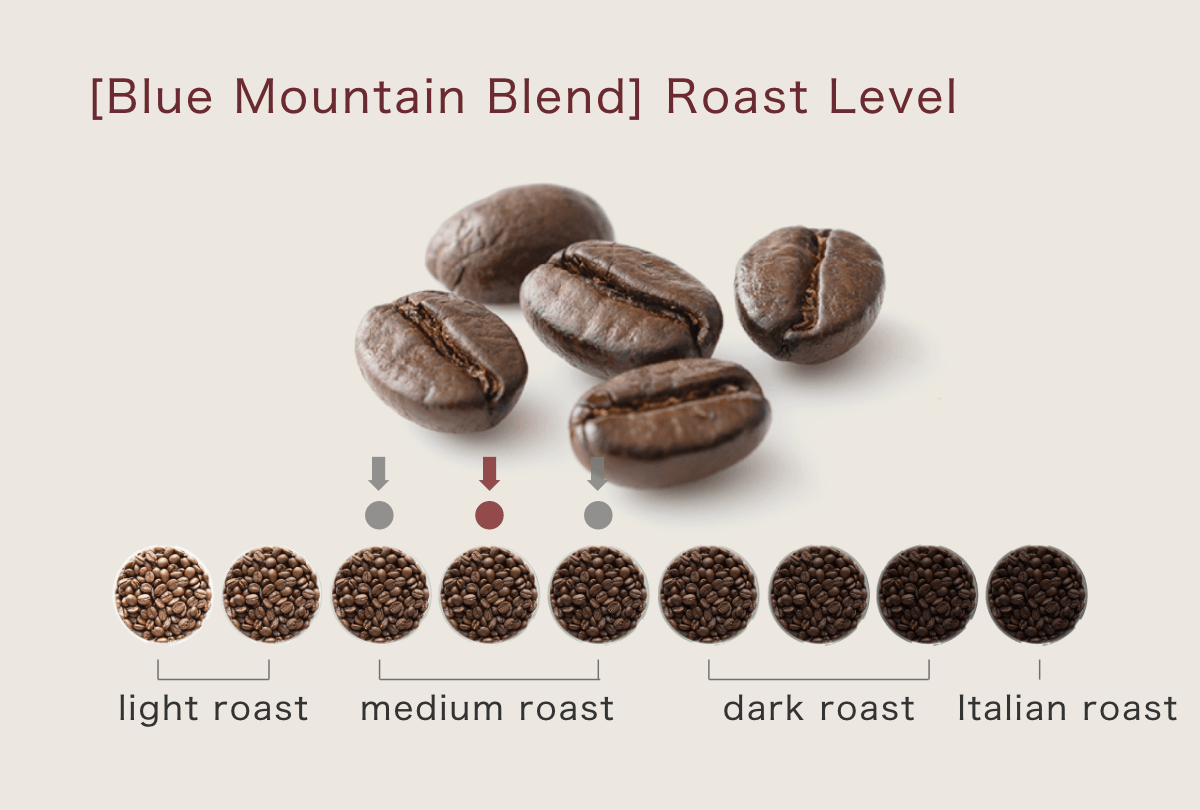
The medium roast range includes medium roast(Gray ↓), medium+ roast(Burgundy ↓), and dark roast(Gray ↓).
At these levels, bean surface hardness and moisture content are moderate, meaning water absorption into the grounds is also moderate — a useful baseline when comparing with light or dark roasts.
About COFFEEBOY’s Blue Mountain Blend
【This blend】is designed to be easy to extract and forgiving for a variety of drinkers. Compared to the single origin【Blue Mountain No.1】, it offers a broader spice aroma profile.
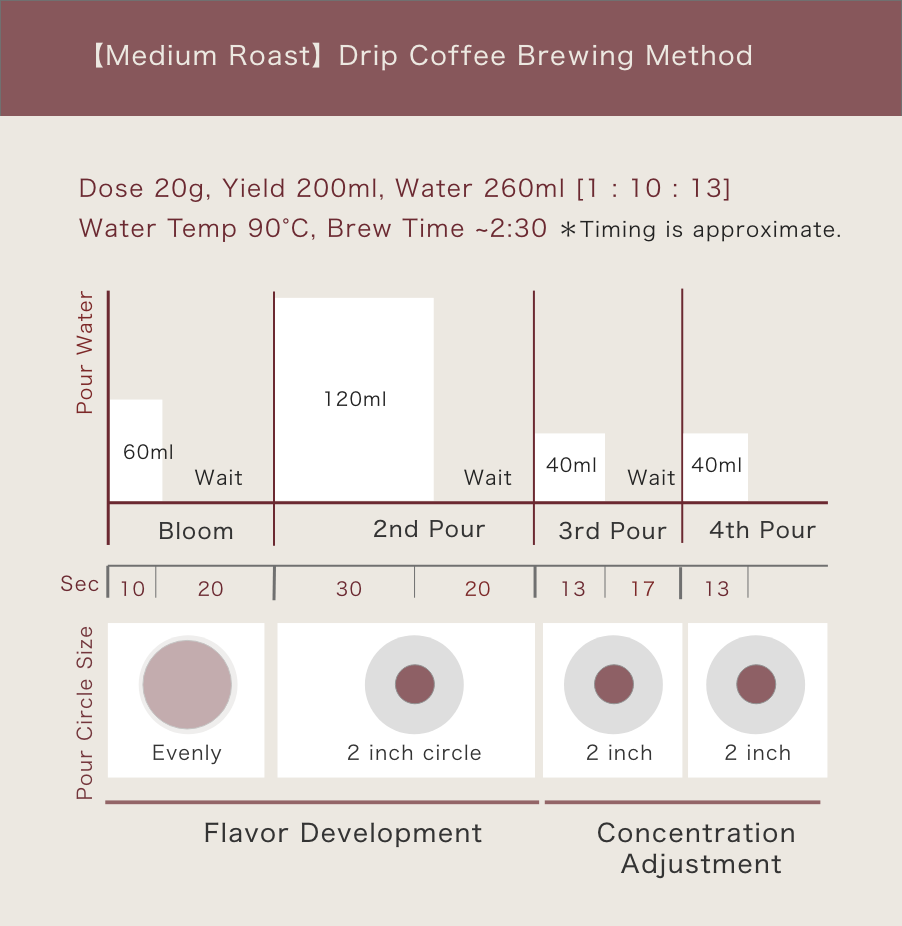
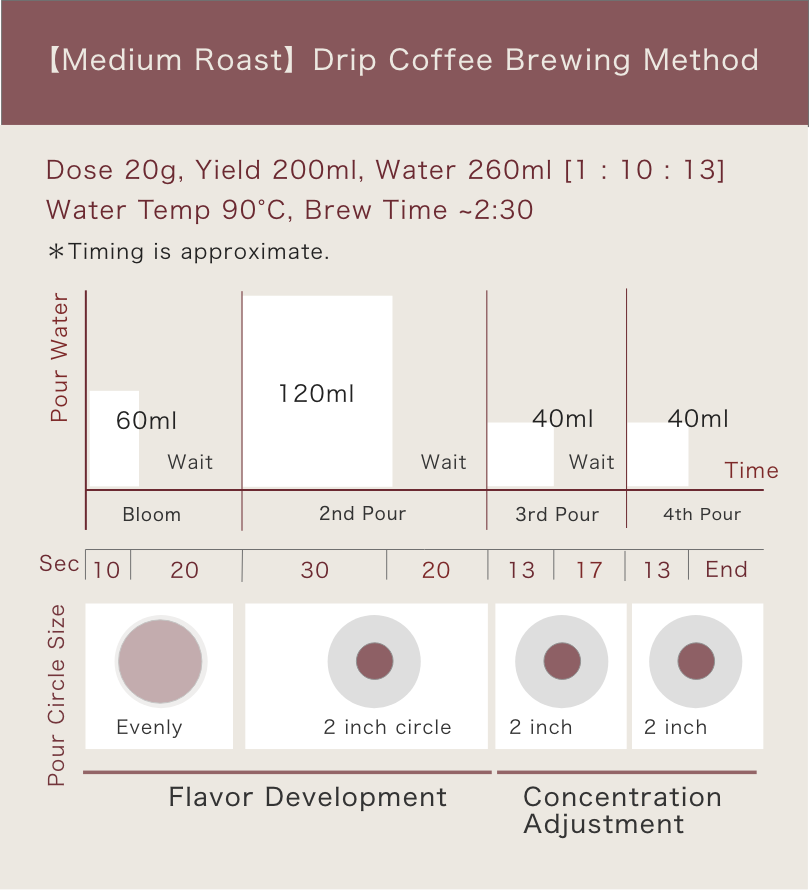
2. Drip Coffee Recipe MAP (Medium Roast)

This recipe map for medium roast drip coffee can also be applied tomedium-high and high roasts.
●Goal
The goal is to draw out a gentle, creamy body and savory aroma.
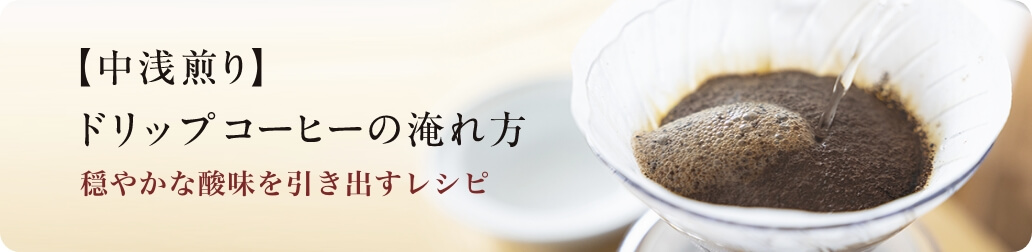
3. Coffee and Water Amount, Grind Size, and Temperature
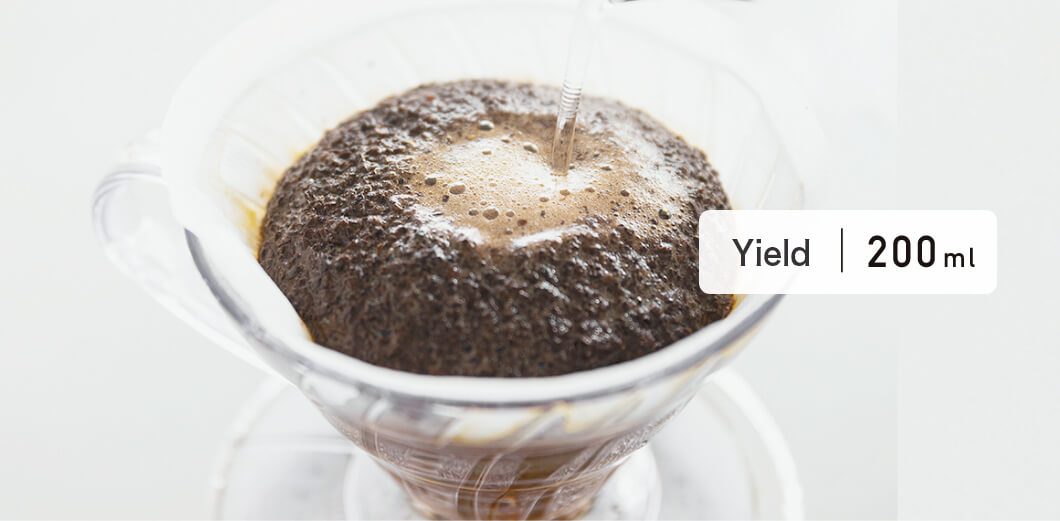
We will brew about 200 ml of coffee — roughly one mug.
Bean Amount & Grind
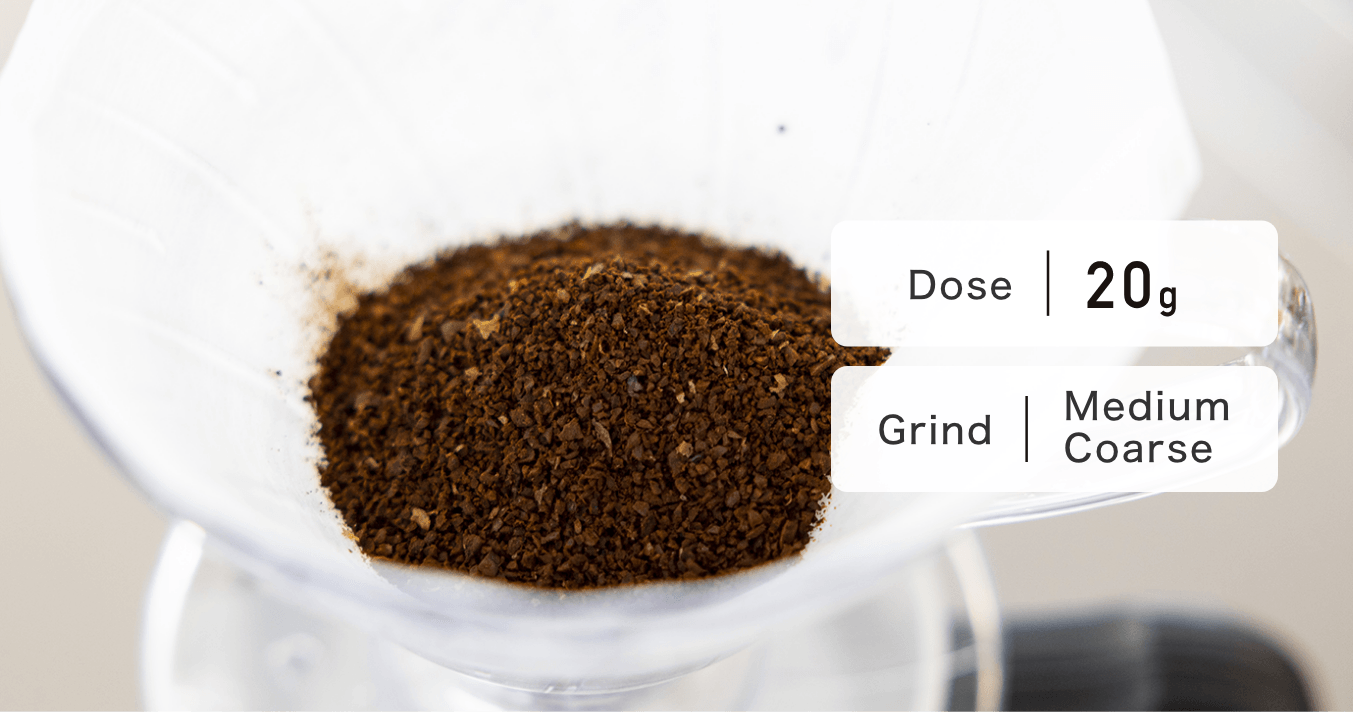
Use 20 g of coffee beans.
If buying whole beans, grind them to aa medium-coarse-size. If purchasing pre-ground beans, a medium grind is ok.
Water Volume & Temperature
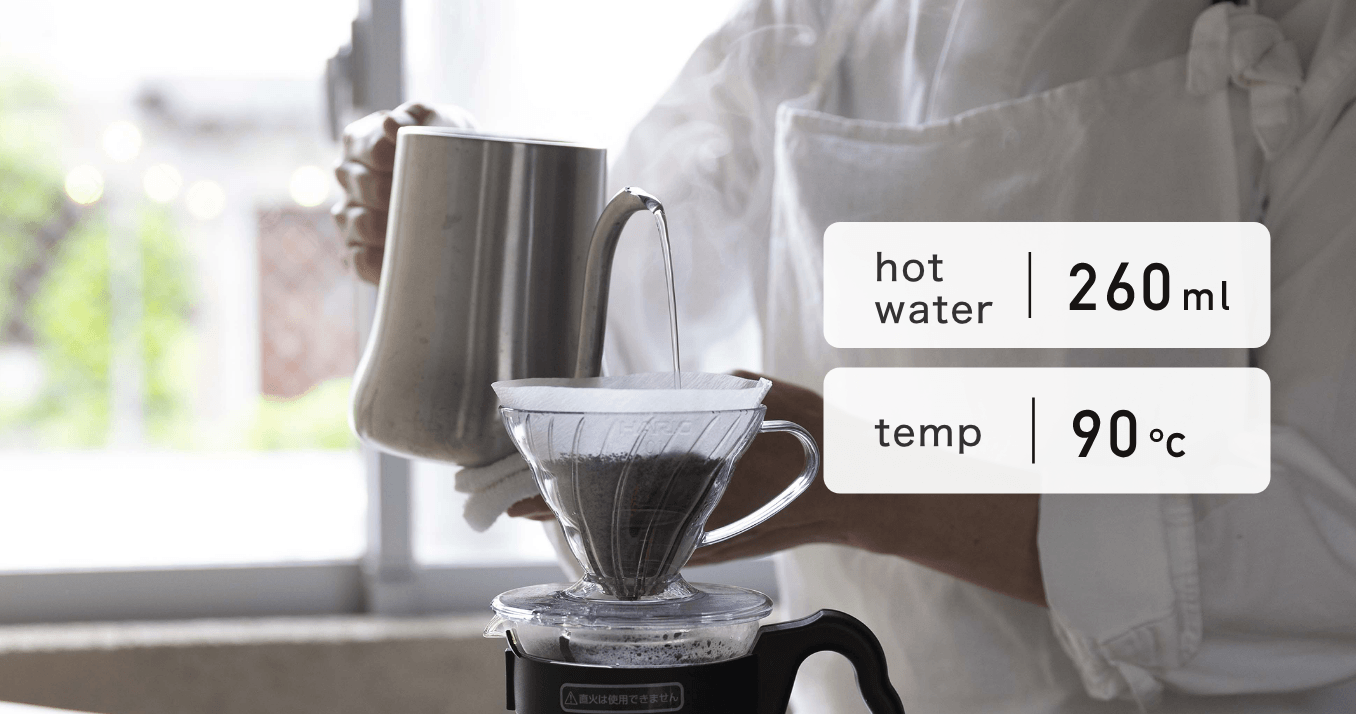
Total pour is260ml(approximately 1.3× finished volume)です。
Ideal water temperature for medium roast is90°C (194°F).
If you don’t have a thermometer:
・Boil water in a pot
・Remove from heat and let it set
・Pour into a room-temperature kettle to cool slightly
Final brewed temperature should be near 75°C (167F) — good for balanced flavor.
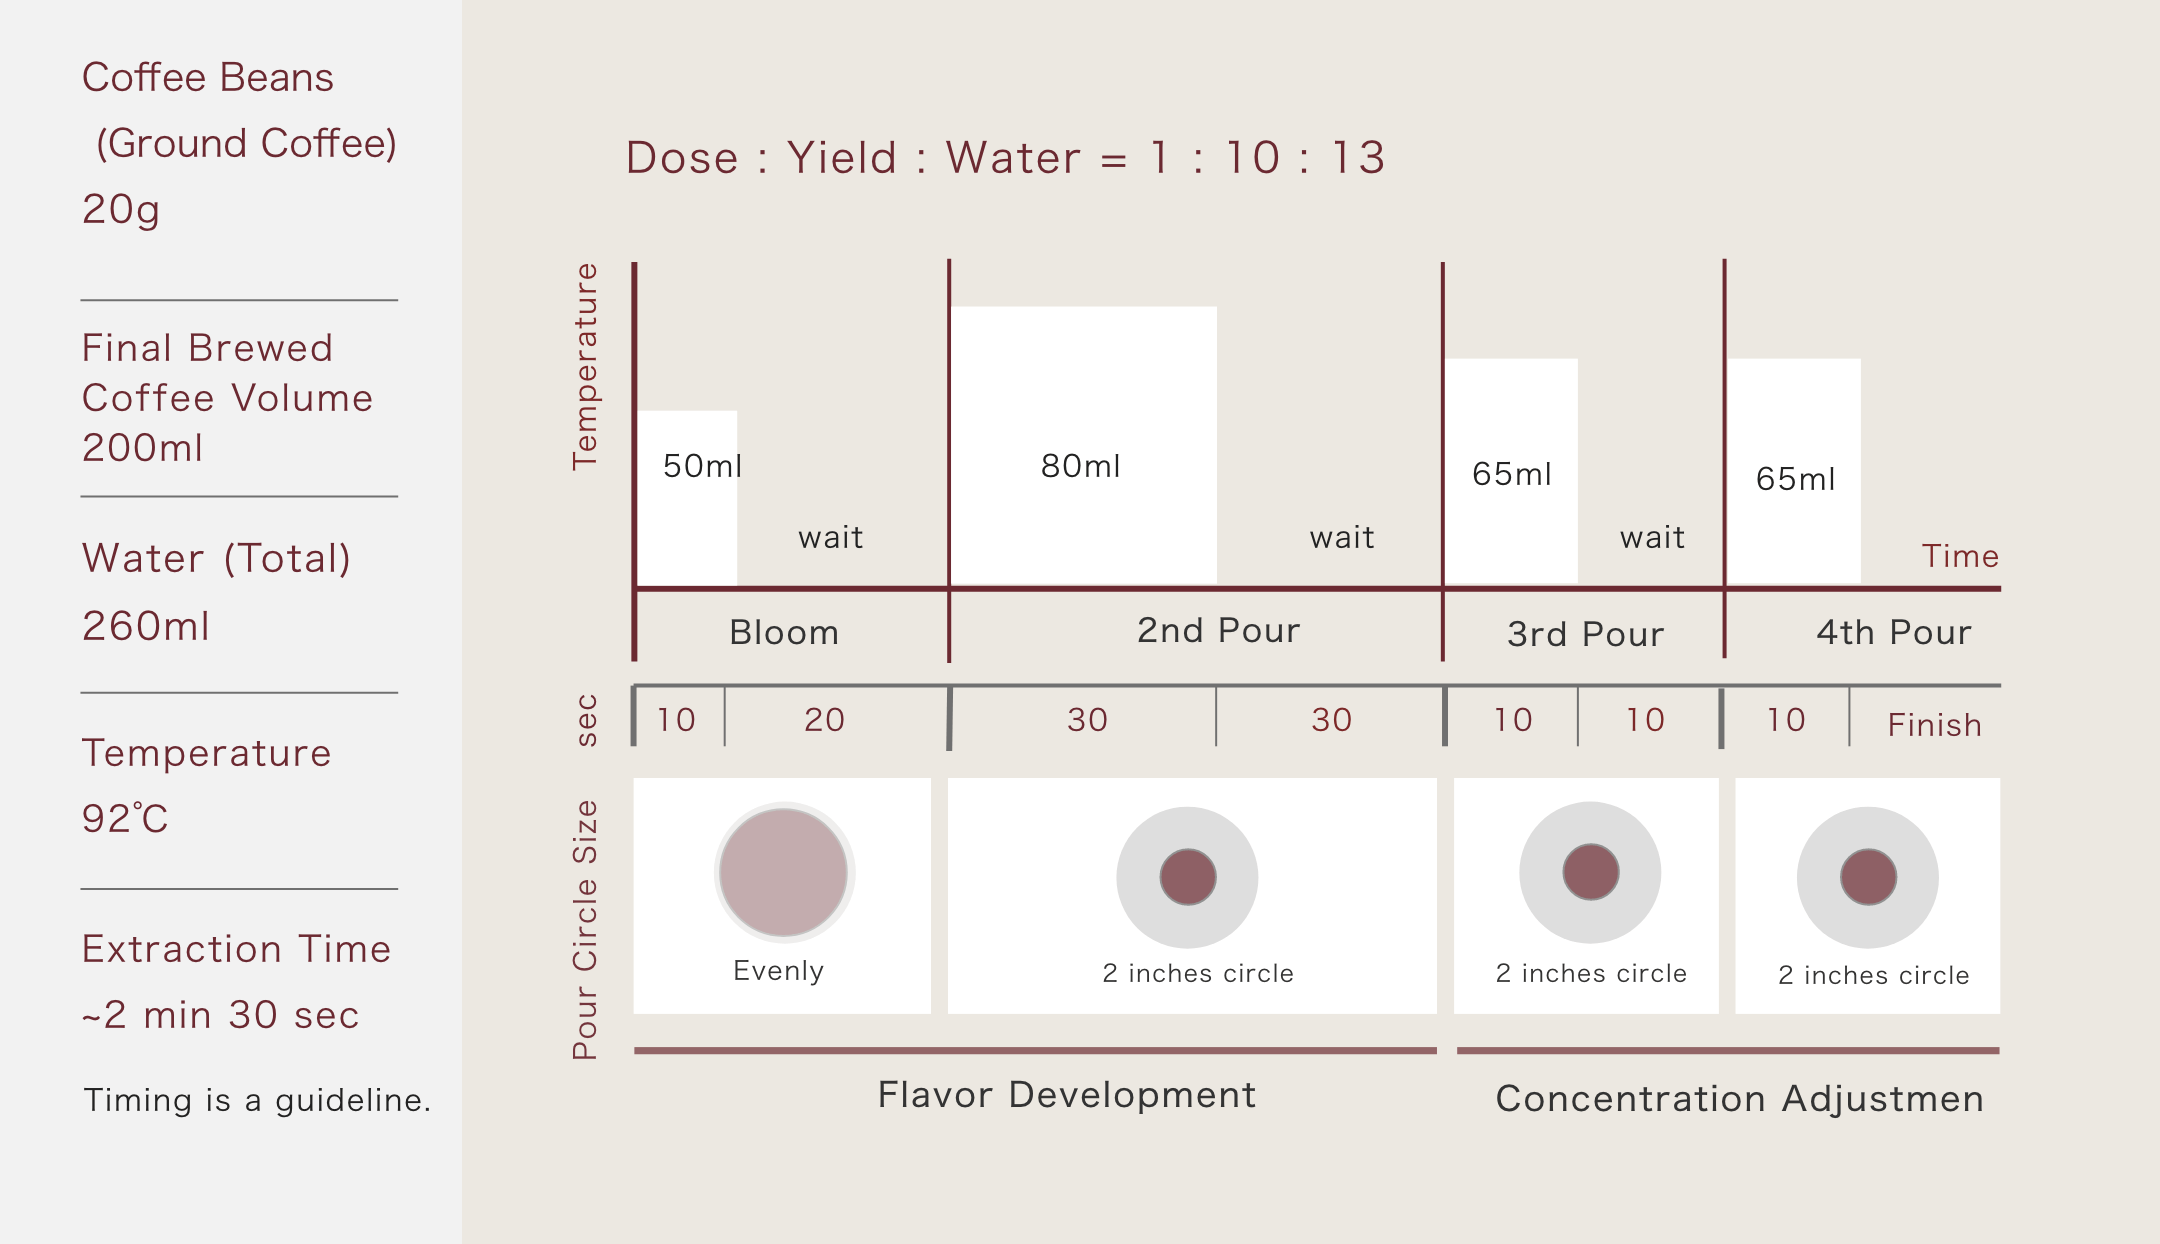
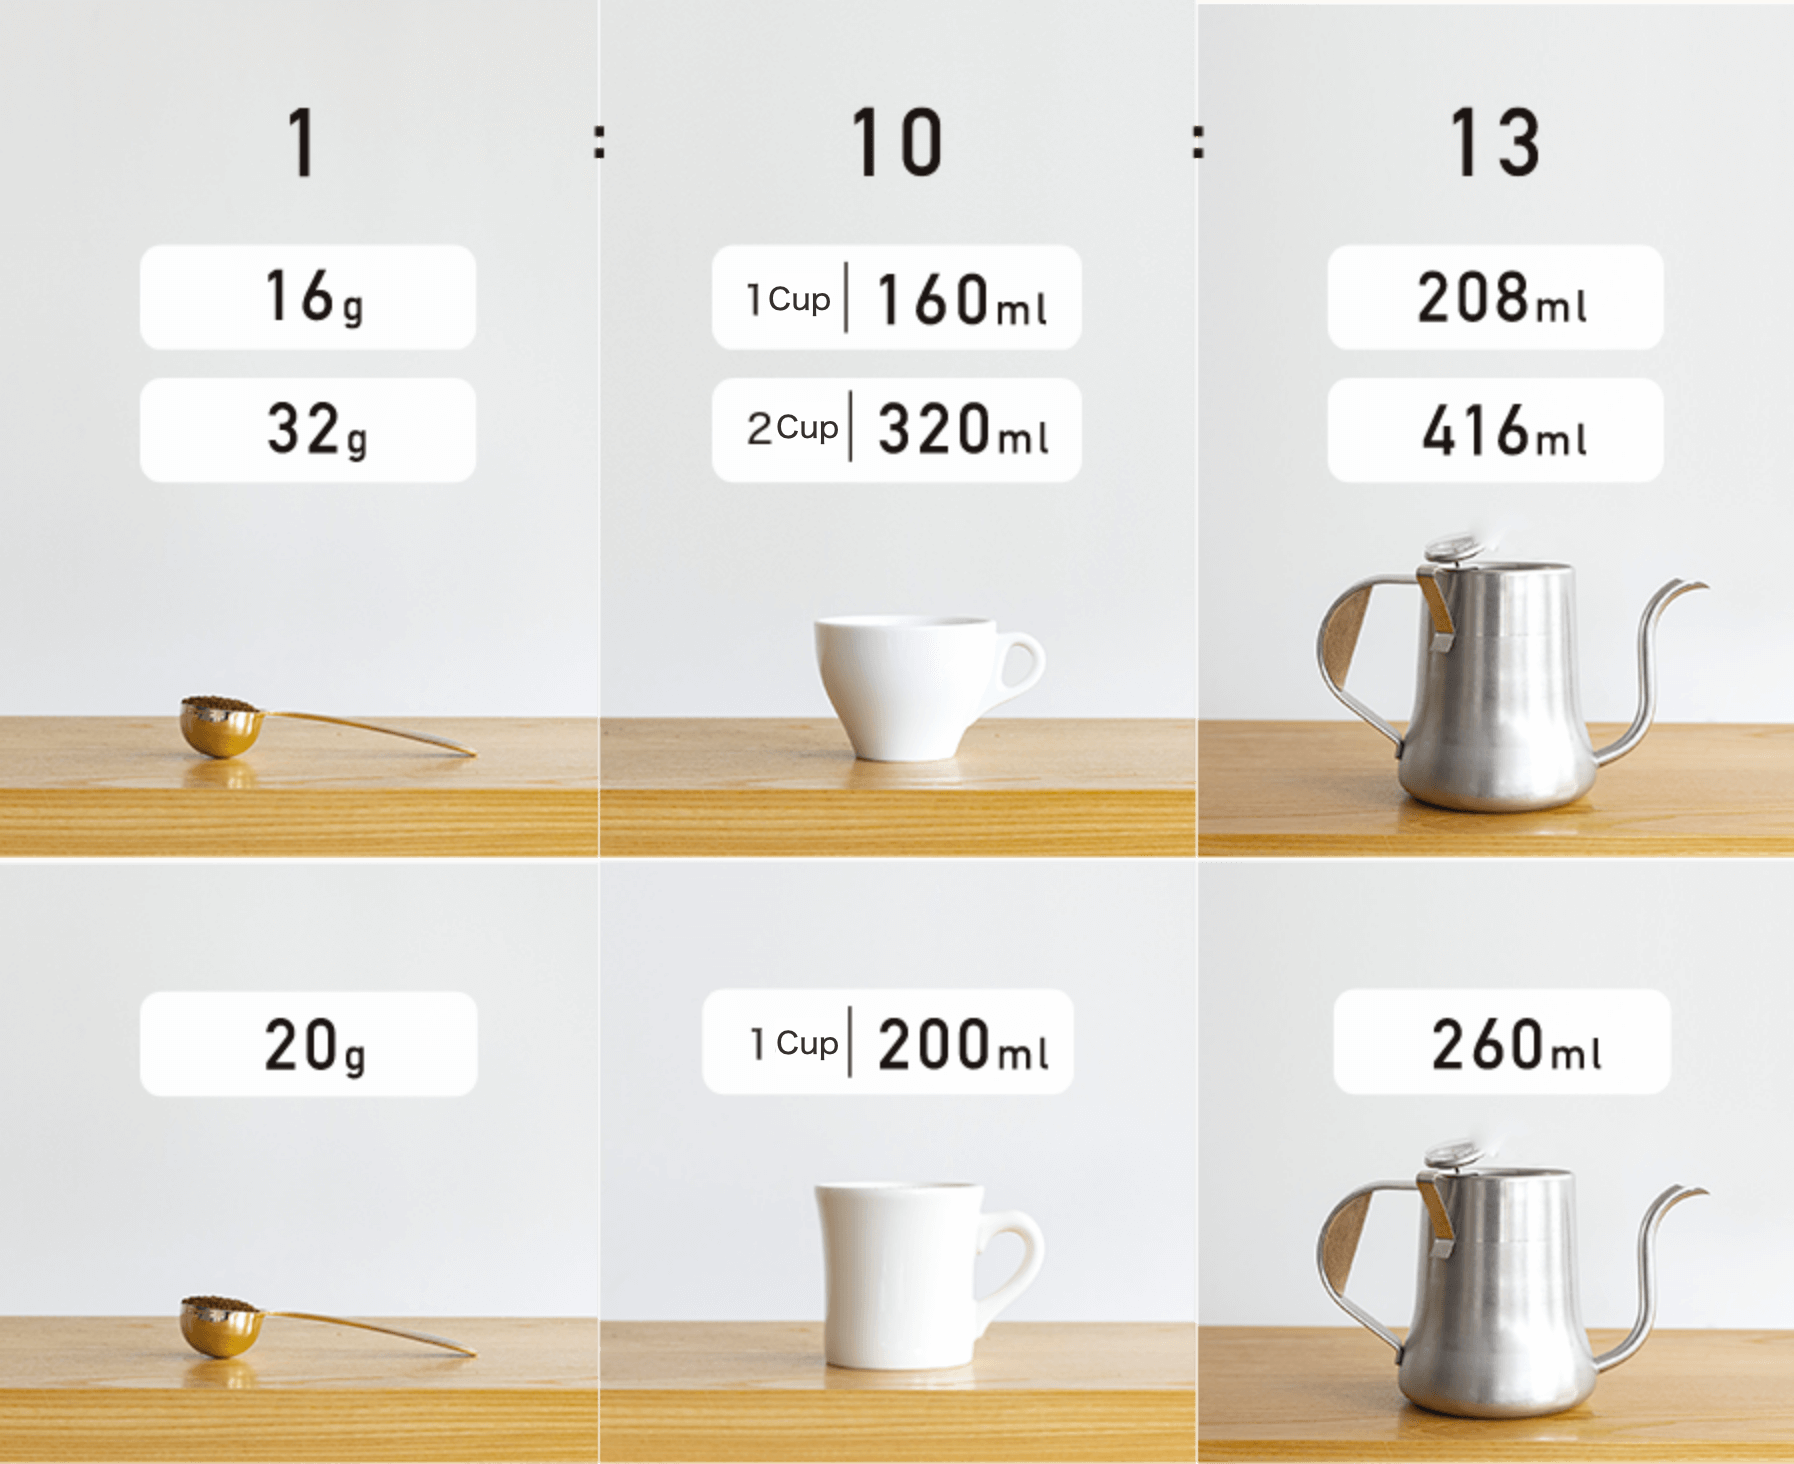
Remember1:10:13 Rule
Remember:
Bean weight : Brewed coffee : Total water = 1 : 10 : 13
A typical coffee cup is~160ml, a mug~200ml.
If you want to brew 320 ml of coffee (about two cups), use 32 g of coffee beans and 416 ml of hot water.
Note:
For specialty coffee, the ratio is 0.95:10:13.
4. Brewing Steps — First Pour / Bloom

Start extraction by blooming.
Wet the grounds to prepare for full extraction.
First Pour — Bloom
Blooming
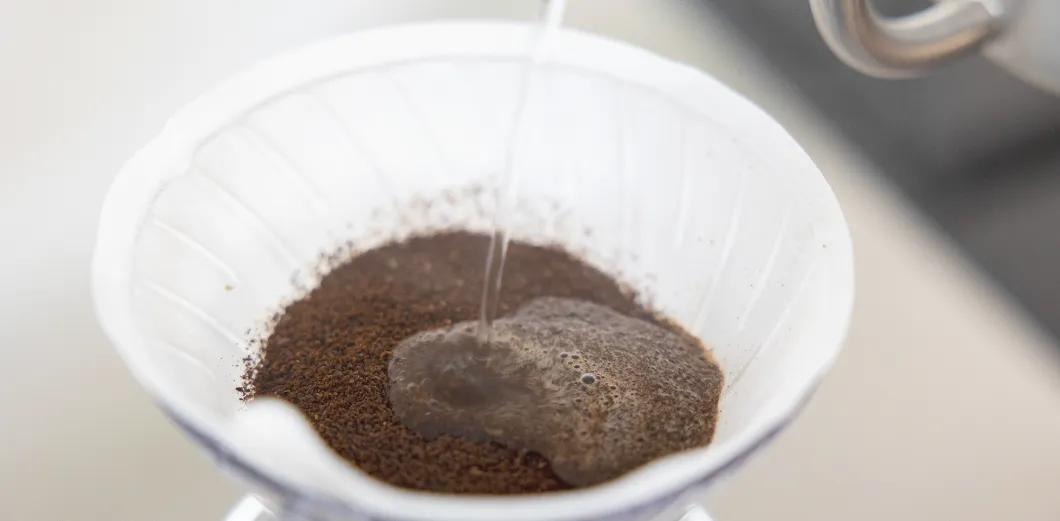
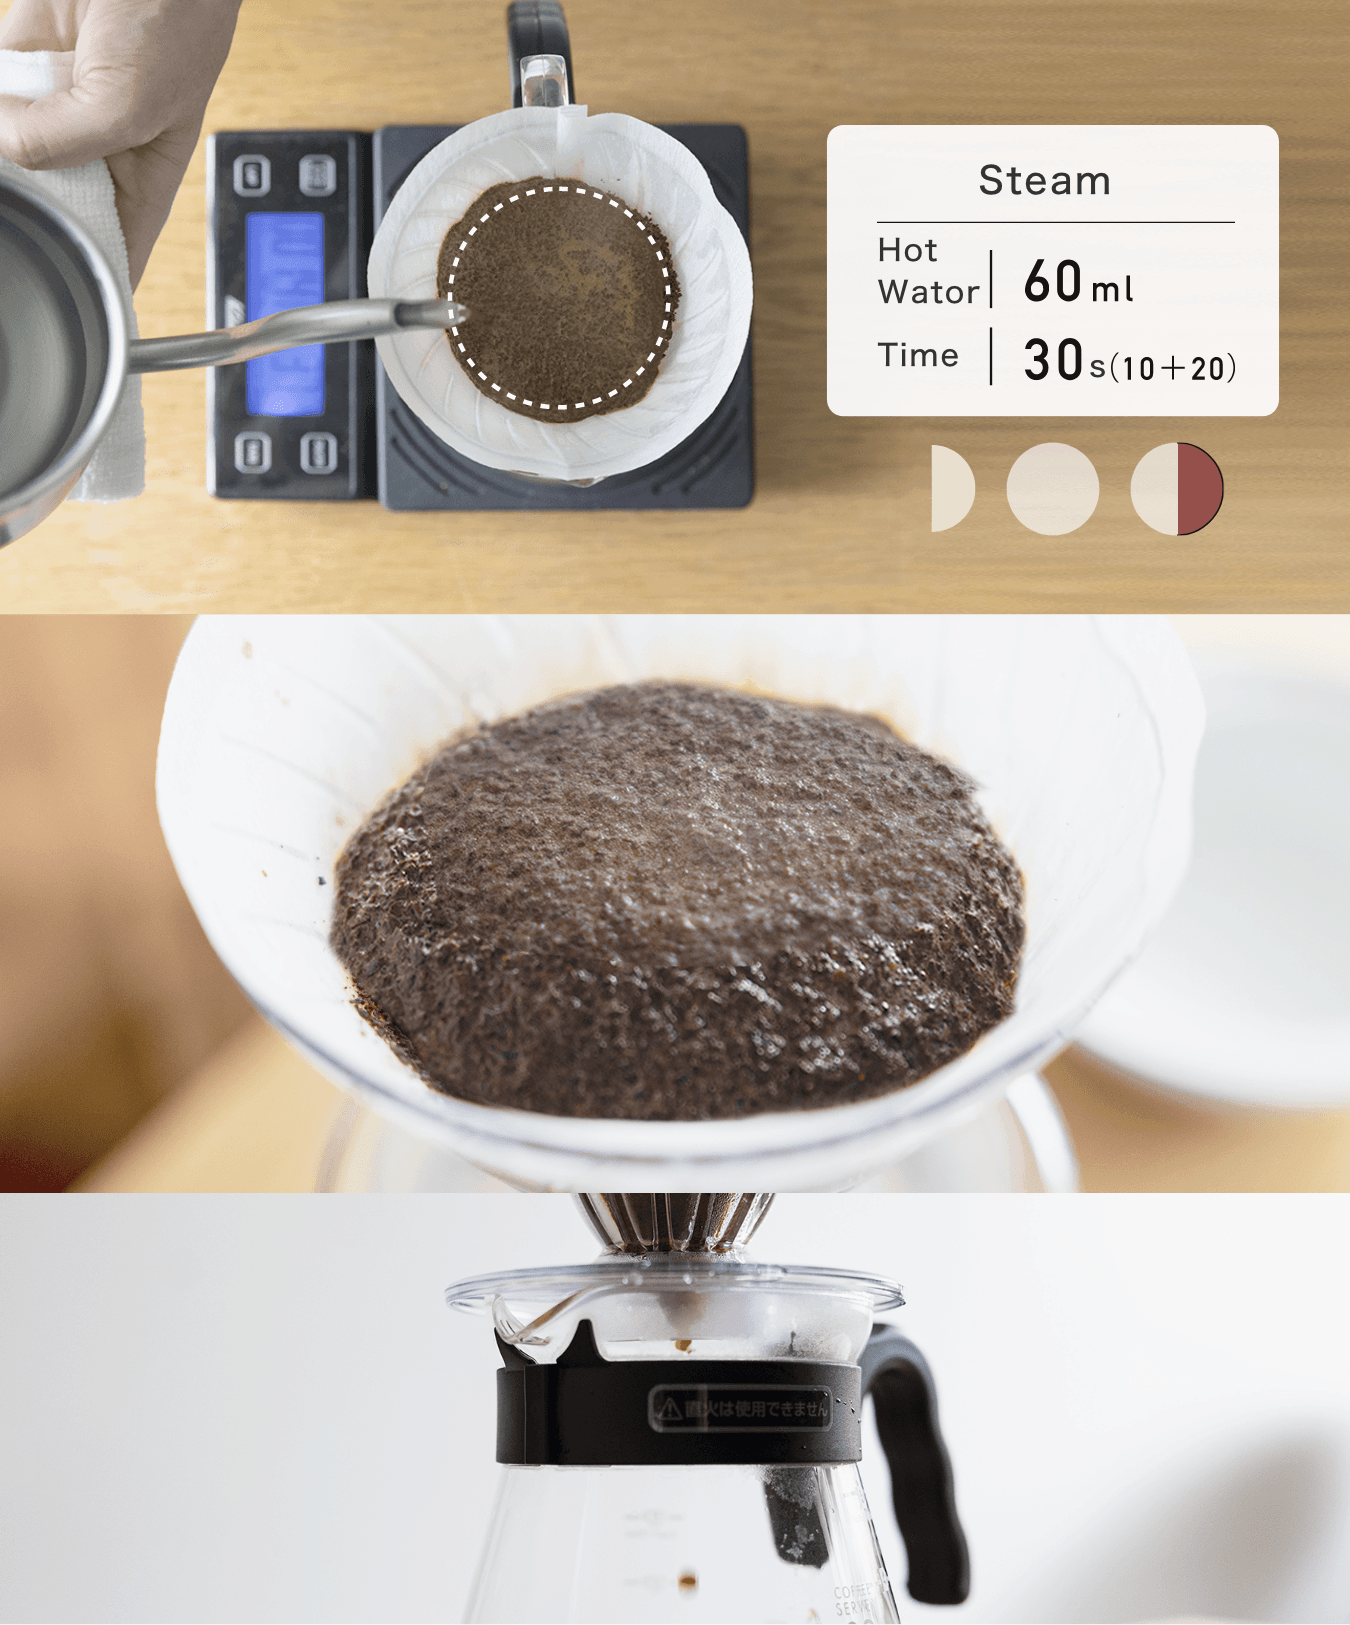
First, level the coffee grounds evenly inside the filter.
Then, gently pour hot water evenly over all the grounds.
As shown in the second image, the coffee grounds will swell and begin preparing for extraction.
The amount of water for blooming is 60ml (60g).
If you do not have a scale:
Continue pouring until drops of coffee begin to drip from the dripper into the server.
At this point, a thin layer of coffee liquid should be visible at the bottom of the server.
The blooming time is 30 seconds(approximately 10 seconds for pouring and 20 seconds for blooming).
The total brewing process takes about 2 minutes and 30 seconds.
Q. Should I wet the paper filter before blooming?
A. We recommend rinsing unbleached, brown paper filters, as odors may remain if they have not been deodorized.
For bleached white paper filters, rinsing is not necessary and does not affect the taste — however, I personally prefer to rinse them as well.
5. Second Pour — Flavor Development
The second pour is the stage where flavor is formed.
During this pour, the main flavor components of the coffee are extracted.
Second Pour — Flavor Development
Second Pour
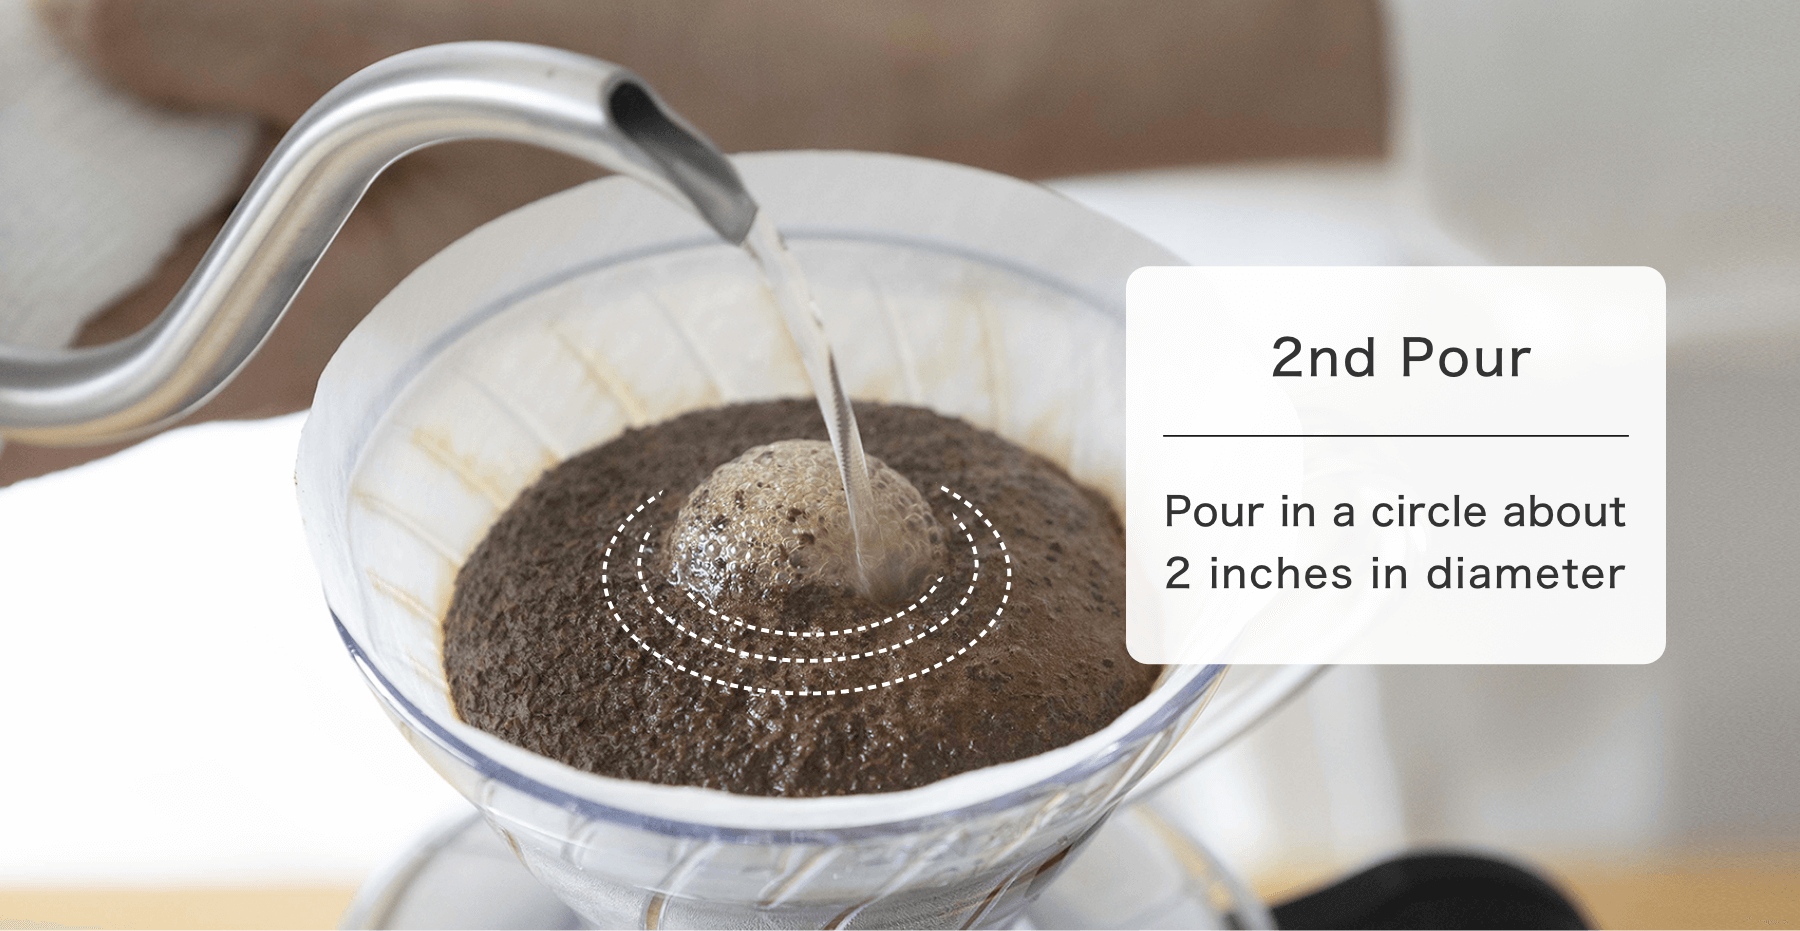
Aim for the peak of the coffee grounds that have swelled during blooming, and drip carefully with a thin, controlled stream of hot water.
While pouring, move the kettle in a circular motion, drawing a circle about the size of a
500-yen coin, about a 2 inch circle
.
Pour from the center outward, then from the outer edge back toward the center, repeating this motion several times.
At this stage, pour with a steady rhythm, extracting the coffee components fully.
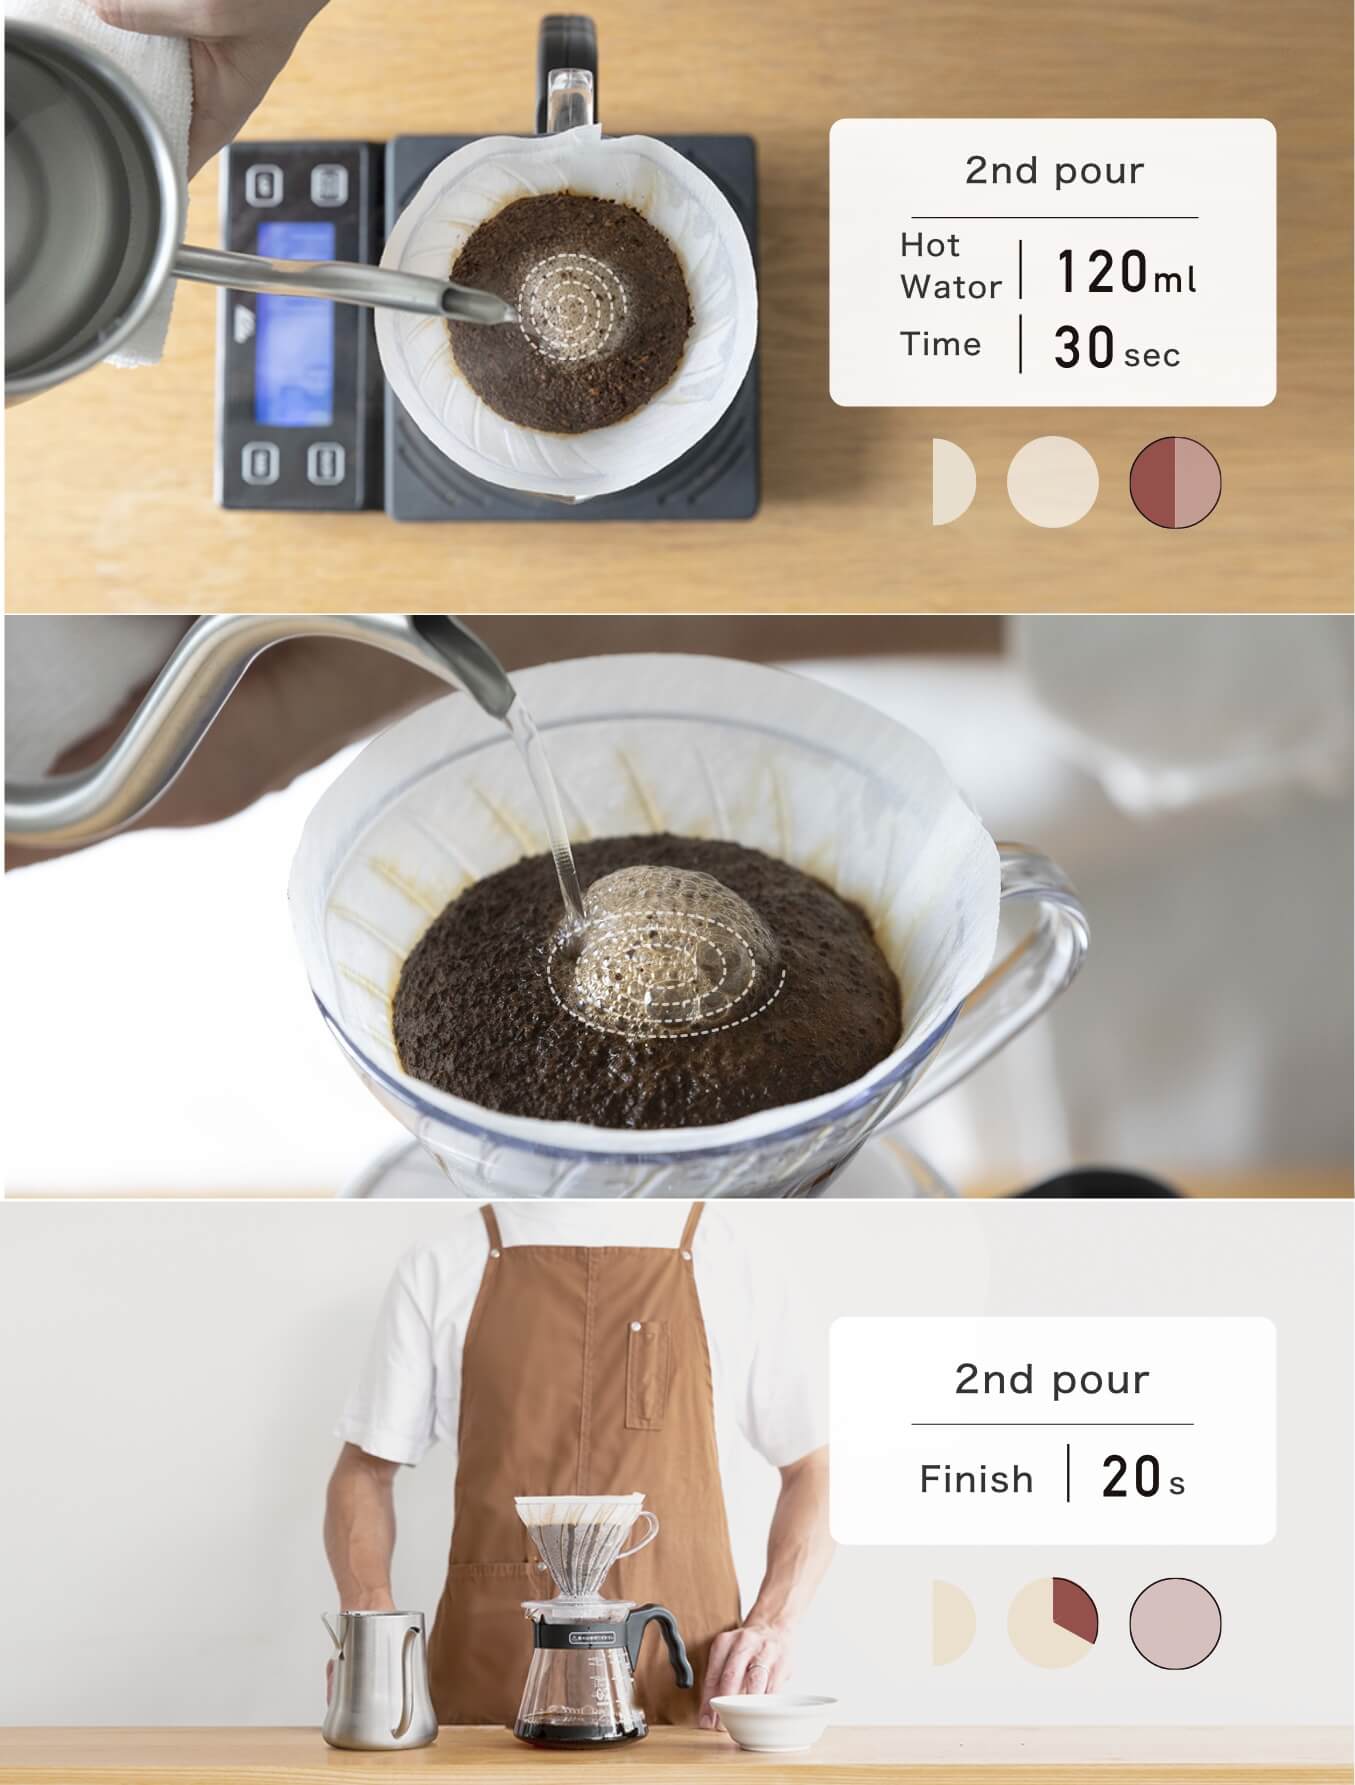
・ Pour 120 ml (120 g) over approximately 30 seconds.
・ If you do not have a scale, continue pouring until the server’s scale reaches about 90 ml.
After finishing the pour, wait until all the coffee has completely dripped into the server.
The second-pour process takes 50 seconds in total
(30 seconds pouring + 20 seconds waiting).
6. How to Brew Medium Roast Drip Coffee:
Third and Fourth Pours –Strength Adjustment
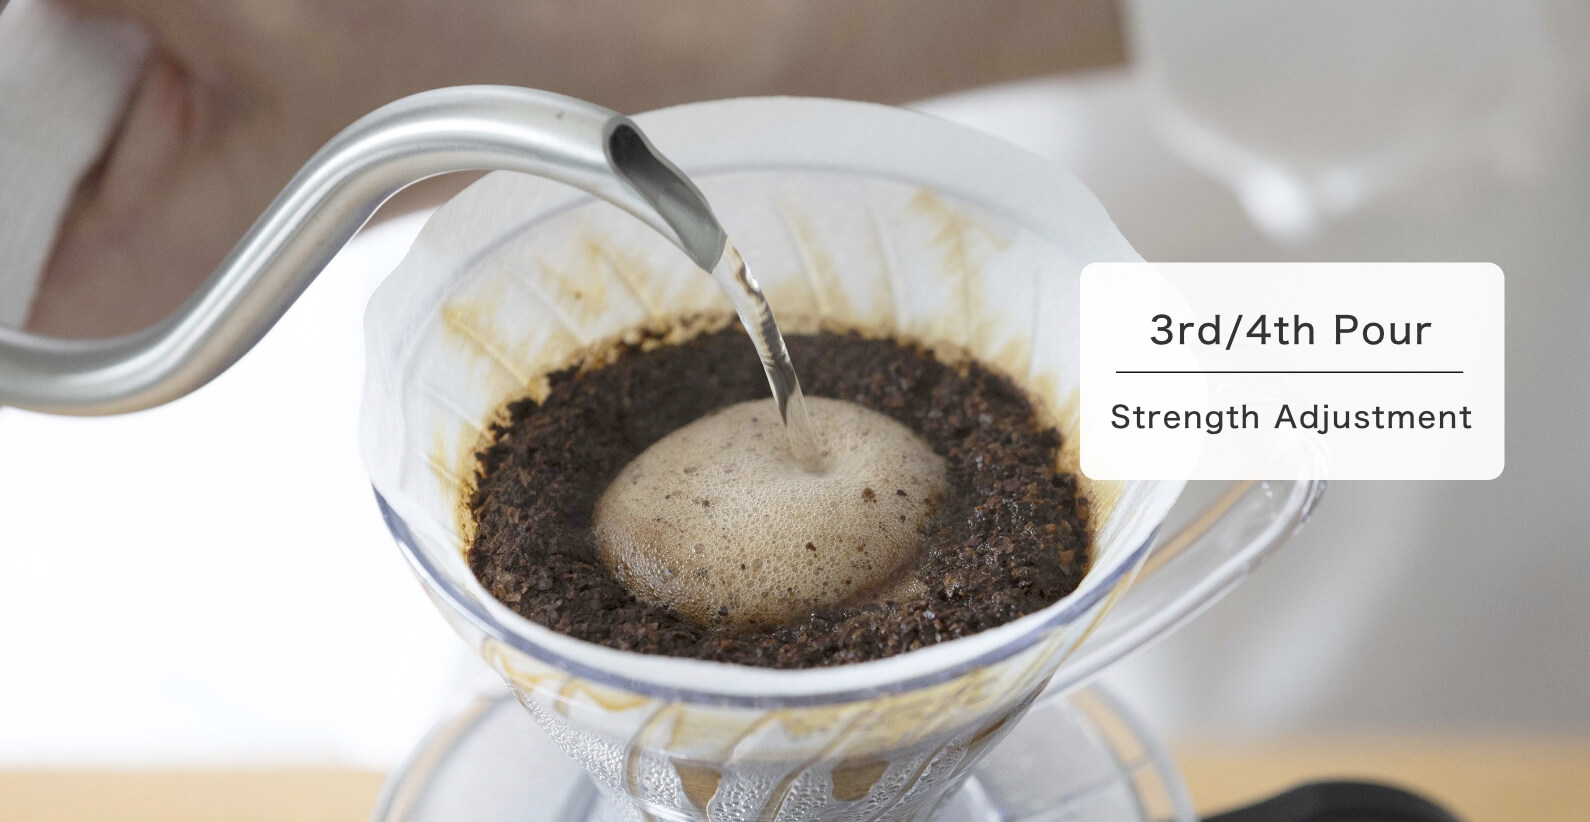
After extracting the main coffee components during the second pour, adjust the strength of the coffee.
Third Pour — Strength Adjustment

Third Pour
As with the second pour, pour 40 ml over approximately 13 seconds, moving the kettle in a circular motion about the size of a 500-yen coin.
The pouring speed should be roughly the same as during the second pour. Use a thin, steady stream of hot water and pour with good rhythm.
Pouring outside the 500-yen-coin circle may cause uneven extraction and unwanted flavors.
Be careful not to break the “wall” formed during the second pour (the raised outer edge of the coffee grounds), and keep pouring within the circle.
After pouring 40 ml, wait until the coffee finishes dripping.
The third-pour process takes about 30 seconds in total
(approximately 13 seconds pouring + 17 seconds waiting).
Note:The times given are guidelines. Drip speed may vary depending on the shape of the dripper and other factors.
Fourth Pour
As with the third pour, pour 40 ml at the same speed, staying within the 500-yen-coin circle.
Once all 260 ml of water has been poured,
wait until the coffee has completely finished dripping.Your medium roast hand-drip coffee is now complete.
7. How to Bring Out Sweetness and Body
In this section, we explain the techniques to bring out sweetness and body, and how the extraction process works.
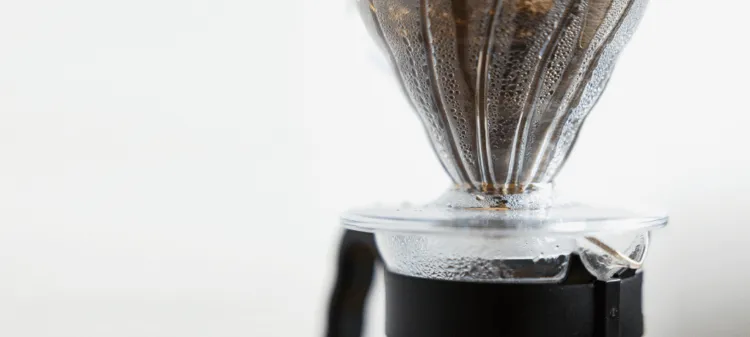
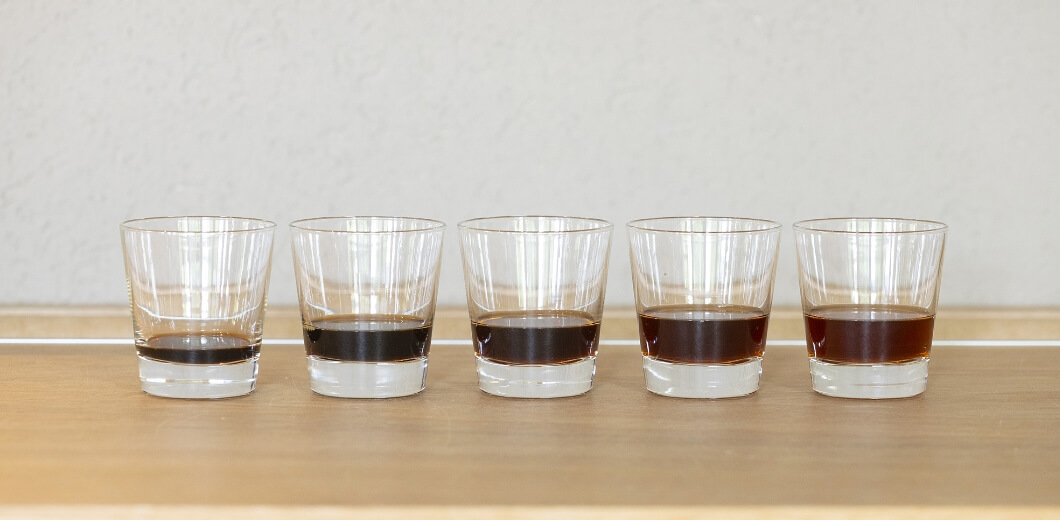
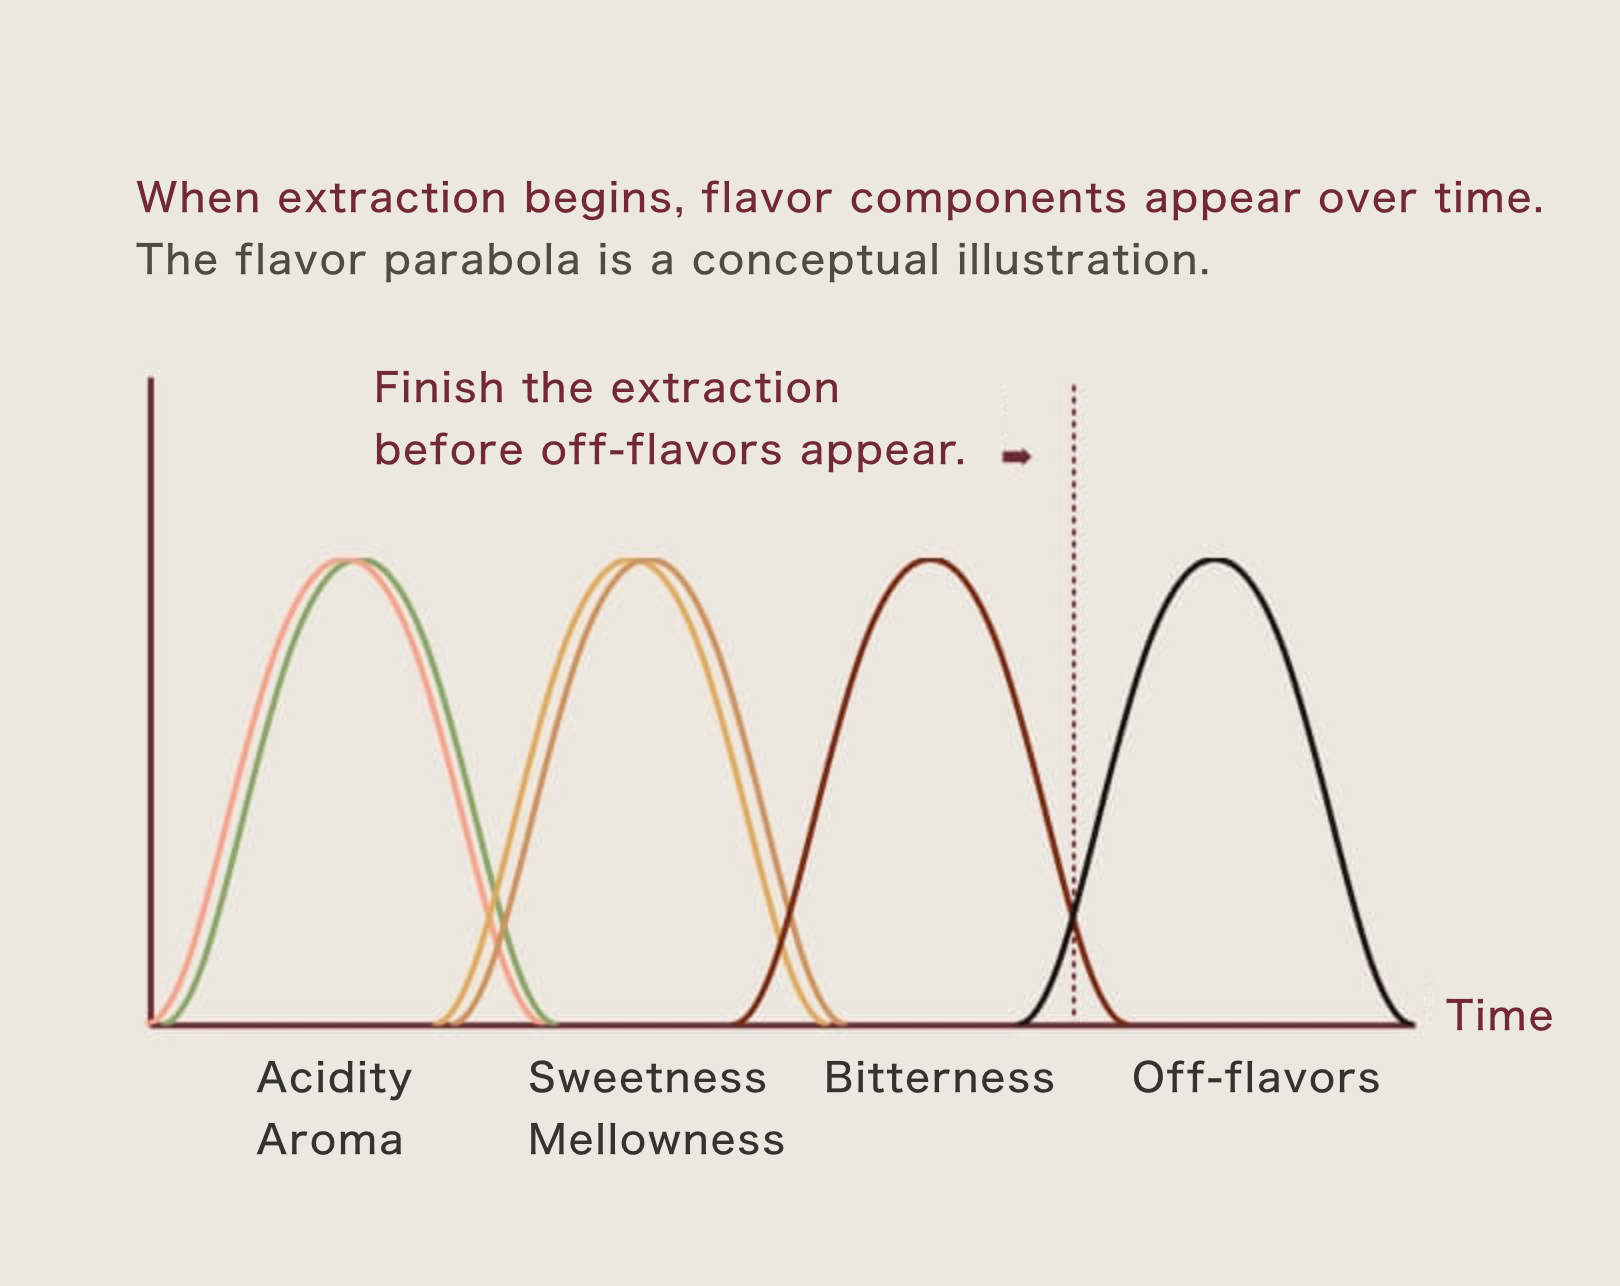
[Important]Flavor Appears in Stages
In the image of the glasses, the total extraction time
(approximately 2 minutes 30 seconds to 3 minutes) is divided into five equal parts.
Coffee brewed at different time intervals is collected separately into each glass.
When tasting each cup — a process known as cupping in coffee — you will notice that coffee flavors appear in the following order:
1. Acidity and aroma
2. Sweetness and smooth body
3. Bitterness
4. Unwanted flavors
Professional competitors take advantage of these time differences to intentionally create their desired flavor profiles and compete based on their skills.
Pour More Water During the Sweetness Extraction Phase
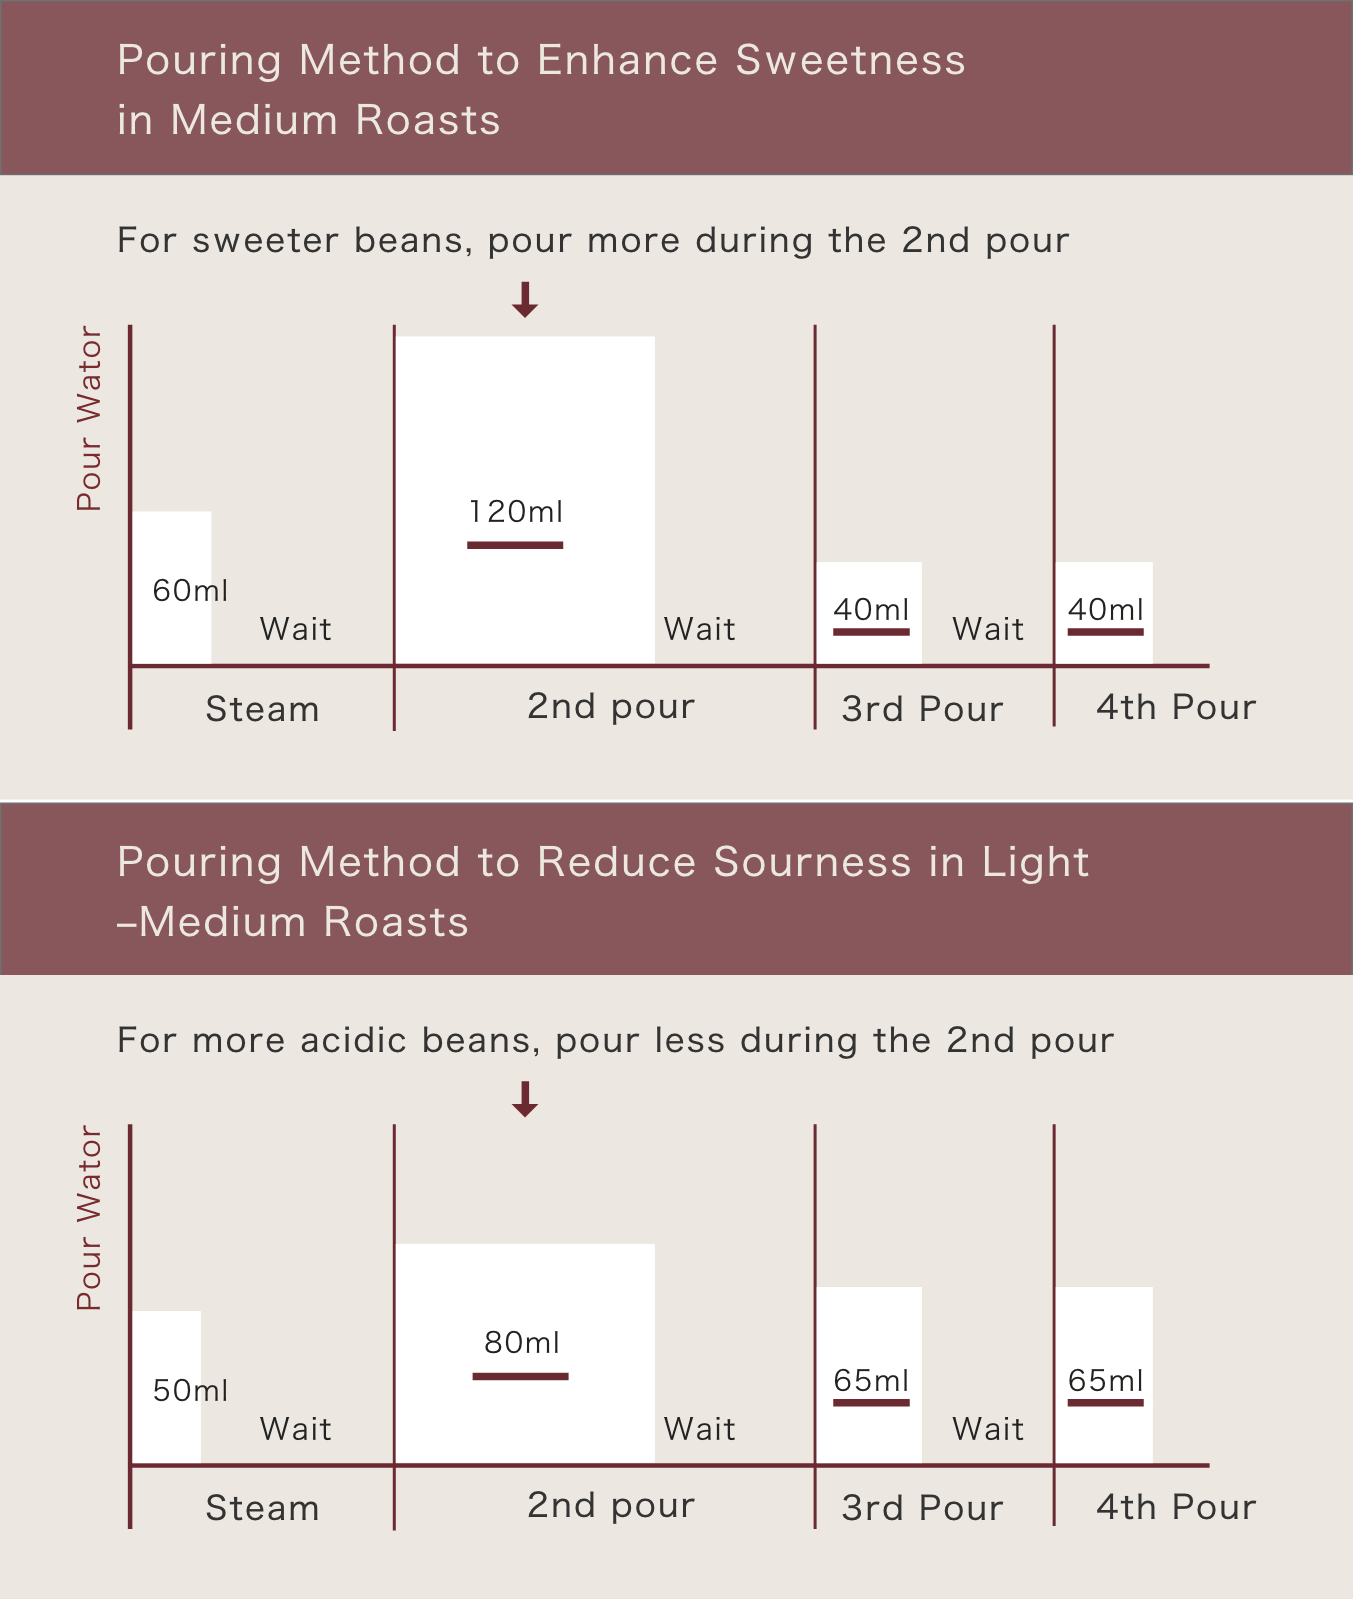
Below is a comparison of water volumes between the Medium Roast Recipe Map and the Light–Medium Roast Recipe Map.
Second pour (acidity & sweetness phase) Medium roast MAP: 120 ml
Light–medium roast MAP: 80 ml
Third & fourth pours (sweetness / bitterness phase) Medium roast MAP: 40 ml
Light–medium roast MAP: 65 ml
・Medium roast beans naturally contain a higher amount of sweetness.
By pouring more water during the second pour, when acidity and sweetness are extracted, the sweetness can be drawn out more clearly.
・Light–medium roast beans naturally contain more acidity.
By identifying when specific flavors emerge through cupping, and adjusting water volume, water temperature, and pouring technique accordingly, we are able to control the flavor and develop precise brewing processes.
In this way, by identifying when specific flavors emerge through cupping, and adjusting water volume, water temperature, and pouring technique accordingly, we are able to control the flavor and develop precise brewing recipes.
【Medium Roast】How to Brew Drip Coffee
— A Recipe Guide for Bringing Out Sweetness and Body —
8. A Message from the Barista & Summary

We hope you find this guide to Brewing Drip Coffee – Medium Roast Edition helpful.
Hand drip brewing expands your coffee world. Masami Morimoto, Store Manager of the Hikari Main Store
The key point is this:
Focus the water volume during the time period when sweetness is extracted,
then distribute the remaining pours evenly to achieve a well-balanced flavor.
That is the image to keep in mind.
The Joy of Hand Drip Brewing
Hand drip coffee allows you to combine six elements like pieces of a puzzle:
・Coffee bean amount / grind size
・Water temperature / water volume
・Pouring technique / brewing time
By adjusting these elements, you can experience the joy of discovering a cup of coffee that perfectly matches the flavor you prefer.
Coffee Is a Personal Experience
I believe coffee is a deeply personal beverage.
By experiencing many different hand drip methods, I hope you will discover your own medium roast coffee.
Masami Morimoto
Tasting Manager, Tokuyama Coffee Boy Co., Ltd.
Store Manager, Hikari Store
13th Place, Final Round
2017 Japan Hand Drip Championship
Hosted by the Specialty Coffee Association of Japan
Medium Roast Straight Coffee
Hand Drip Recipe Summary
| Final brewed coffee volume: | Approx. 200 ml |
| Coffee grounds: | 20 g, medium-coarse grind |
| Total water / water temperature: | 260 ml / 90°C (194°F) |
| Total brew time: | Approx. 2 minutes 30 seconds |
| 1st Pour 【Blooming】 | |
| Water amount: | 60ml |
| Time: | 30 seconds (pouring time + blooming time) |
| If you don’t have a scale: | Pour until coffee begins to drip steadily from the dripper into the server |
| 2nd Pour 【Flavor Development】 | |
| Water amount: | 120ml |
| Pouring range / pour circle: | About the size of a 500-yen coin |
| Time: | Approx. 50 seconds (from the start of pouring until dripping finishes) |
| If you don’t have a scale: | Pour until the coffee in the server reaches about 90 ml |
| 3rd / 4th Pour 【Strength Adjustment】 | |
| Water amount: | 40 ml each |
| Pouring range / pour circle: | About the size of a 500-yen coin |
| Time: | Approx. 30 seconds (Pouring time: 13 seconds, Waiting time: 17 seconds) |
| If you don’t have a scale: | 3rd pour: Pour until the coffee in the server reaches about 150 ml 4th pour: Wait until all the coffee finishes dripping |
3,680円 → 初回 LINE登録で2,680円へ / 送料330円
2,440円 / 送料330円
3,580円 → 初回 LINE登録で2,580円へ / 送料330円

コーヒーを楽しむブログ
もう一歩先のコーヒーを楽しみたい方へ
役立つメディアです。