


How to Brew Drip Coffee — Light–Medium Roast Edition: Techniques to Bring Out the Gentle Acidity of Mocha
最終更新日: 2026/06/12

Light–medium roast coffee offers a pleasant aroma and gentle acidity that first appears during the roasting process. At this roast level, if extraction is not handled carefully, the coffee can end up lacking body or tasting overly sharp. This article explains how to brew drip coffee that opens up the aroma and brings out a smooth, gentle acidity.
The coffee beans used for this drip recipe are Ethiopian Mocha, which are easy for anyone to find.

We will be using Ethiopian Mocha beans, which are easy to find both online and in specialty coffee shops, and are known for their fruity berry and cassis notes.
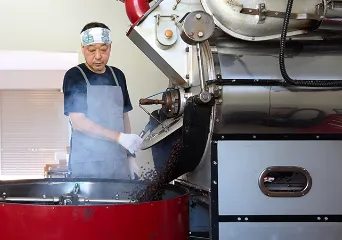
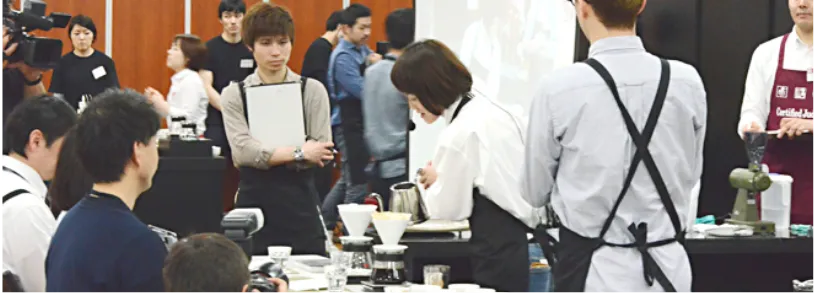
This recipe is supervised by Masami Morimoto, Head Barista of the Hikari store and a finalist of the 2017 Japan Hand Drip Championship.
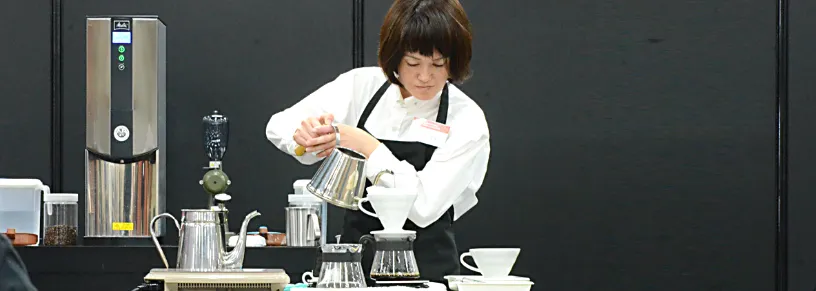
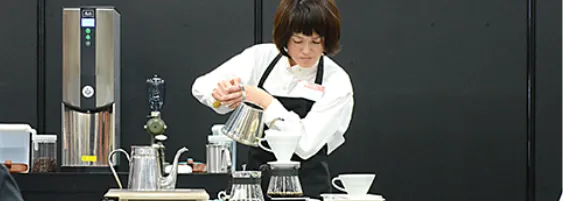
This recipe is supervised by Masami Morimoto, Store Manager of the Hikari location and finalist of the 2017 Japan Hand Drip Championship. Starting with awareness of bean amount, grind size, water volume, and temperature is the first step toward delicious drip coffee. With this recipe, we hope you’ll stand at the entrance to hand drip coffee. — Masami Morimoto.
Now, let’s brew delicious light–medium roast drip coffee!
Contents
1. Light–Medium Roast Beans and Their Characteristics
2.【Light–Medium Roast】How to Brew Drip Coffee — Recipe MAP
3. Coffee Beans, Water Amount and Temperature and Grind Size
4. Light–Medium Roast Drip Coffee Brewing: 1st Pour / Bloom
5. Light–Medium Roast Drip Coffee Brewing: 2nd Pour / Flavor Formation
6. Light–Medium Roast Drip Coffee Brewing: 3rd / 4th Pour — Concentration Adjustment
7. How to Brew Without Excess Acidity and Its Mechanism
1. Light–Medium Roast Beans and Their Characteristics
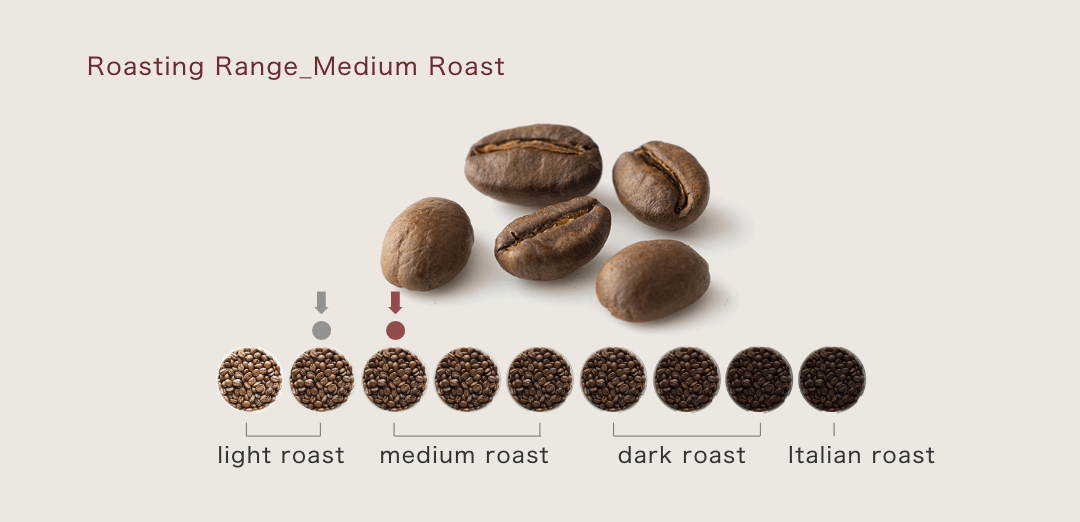
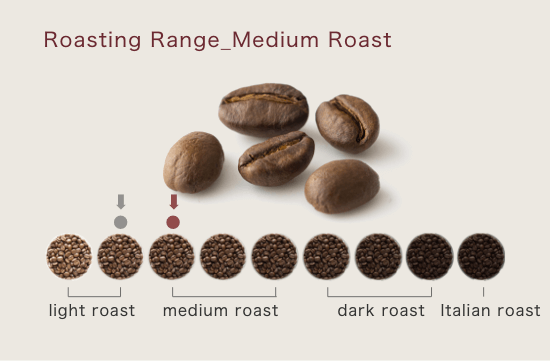
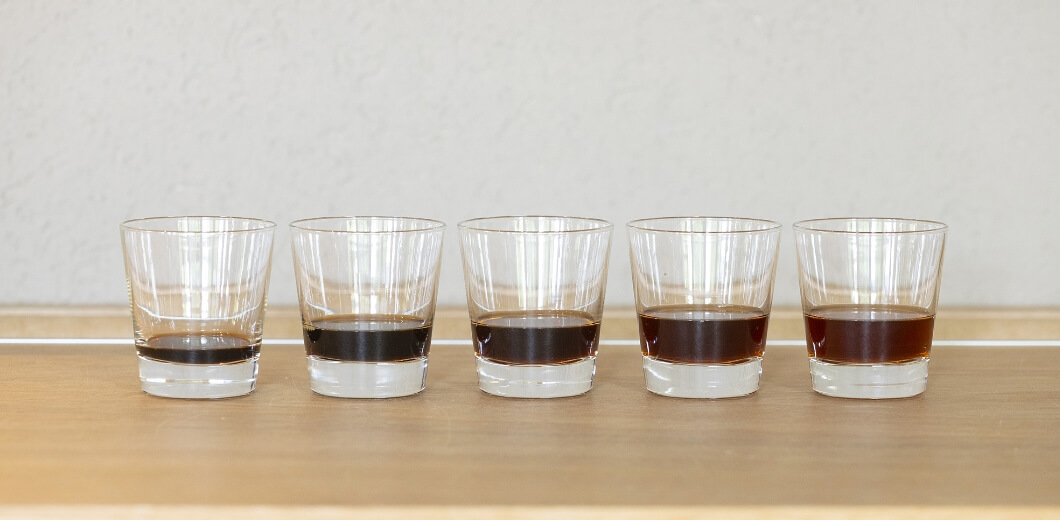
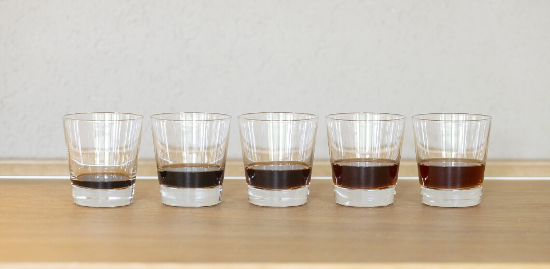
The light–medium roast range covers the area from Cinnamon Roast(Gray⬇︎)to Medium Roast(burgundy⬇︎).
The characteristics of these coffee beans are: relatively hard outer layer and a higher moisture content.
When ground with a manual grinder, they make a crisp, crunchy sound and require a noticeable amount of force.
This indicates that, once dripping begins, the coffee grounds absorb hot water slowly.
By paying close attention to the grind size and water temperature, you can gradually open up the aroma during extraction.
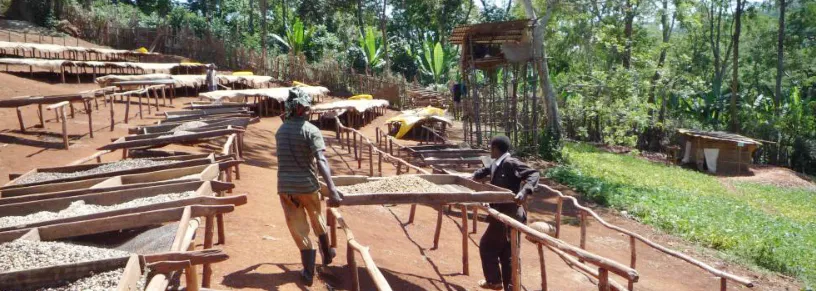
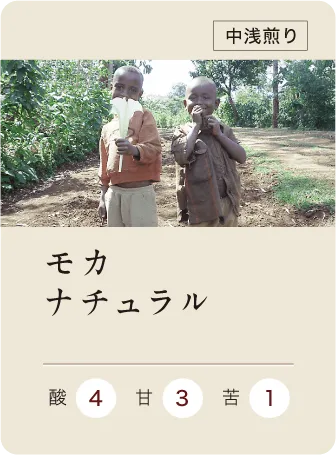
About Ethiopia Sidamo Natural beans roasted by COFFEEBOY
At COFFEEBOY, we roast 【Ethiopian coffee beans grown in the Sidamo region】 as our light–medium roast offering,
and sell them as 【Ethiopia Mocha Natural】.
It is roasted at a medium roast level close to cinnamon roast.
This is the point at which Mocha’s signature berry and cassis fruit notes, along with its light, fruity aroma, come alive most vividly.
In addition, these green beans often contain heirloom varieties, which can occasionally bring out wild flavor characteristics.
This is also what makes the coffee engaging and never boring to drink, offering a sense of new discovery with each cup.
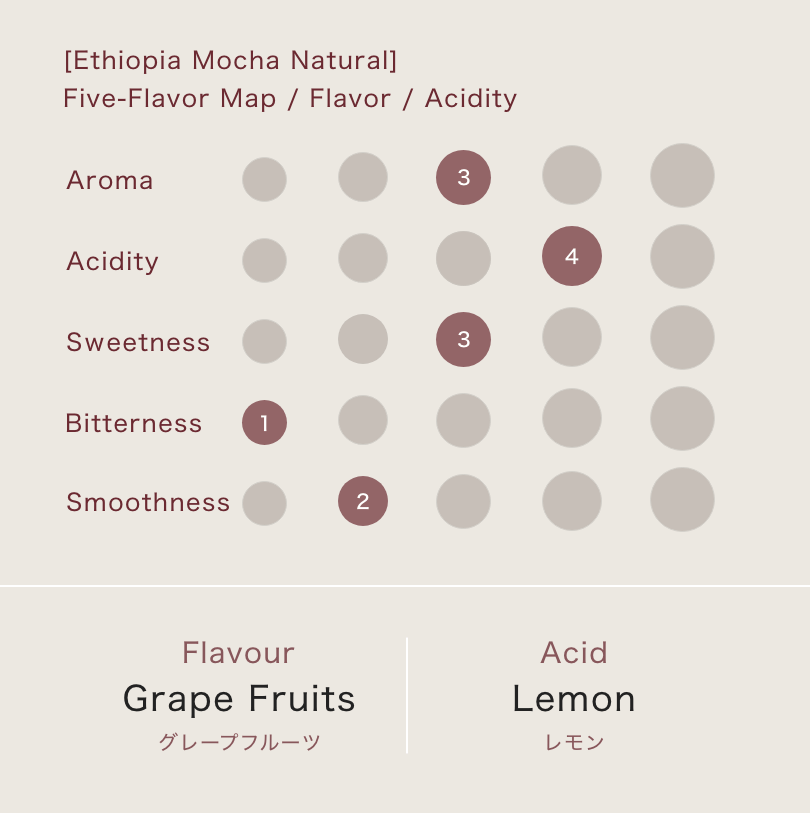
About Ethiopia Mocha Natural
● Medium Roast ●Acidity: 4/5 ●Sweetness: 3/5 ●Bitterness: 1/5 : 200 g / ¥1,560
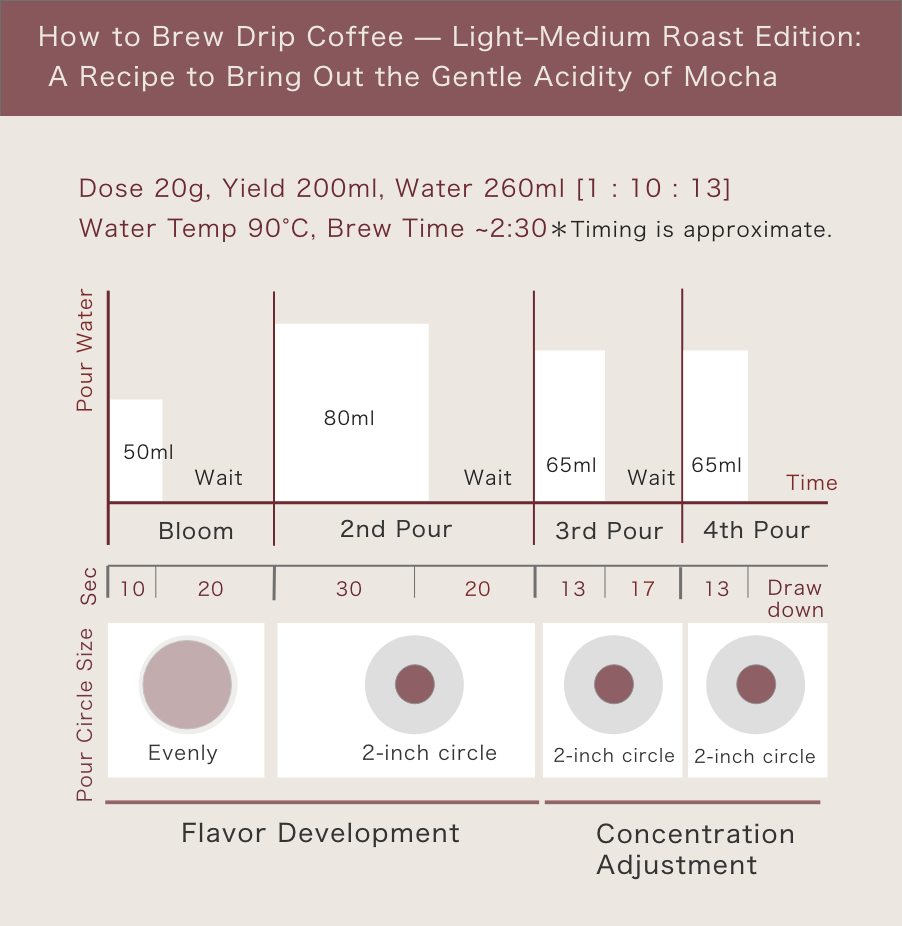
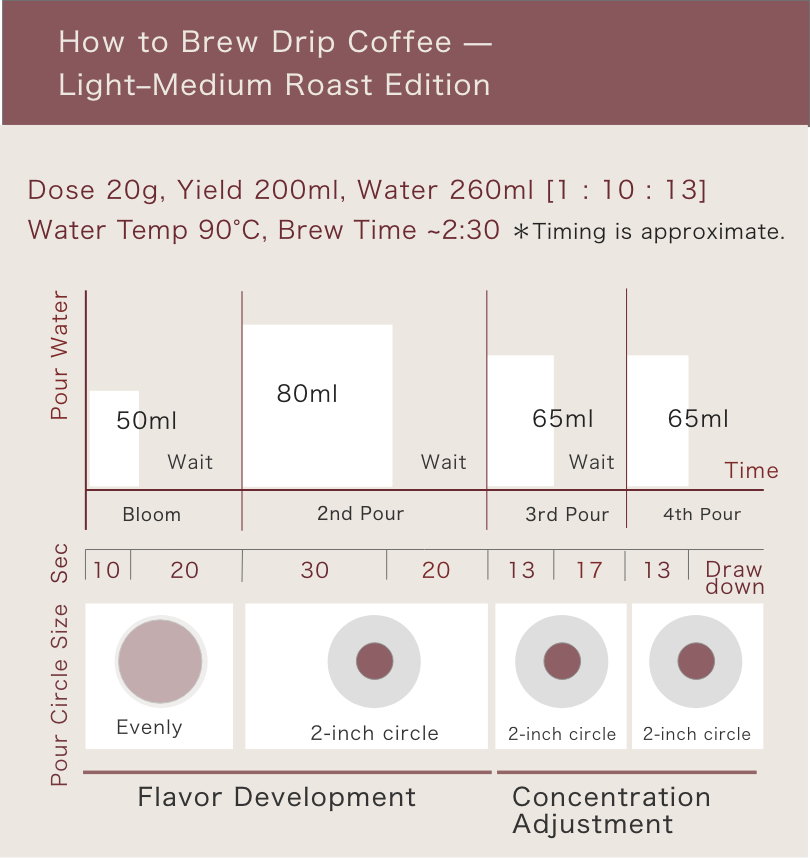
2.【Light–Medium Roast】How to Brew Drip Coffee — Recipe MAP
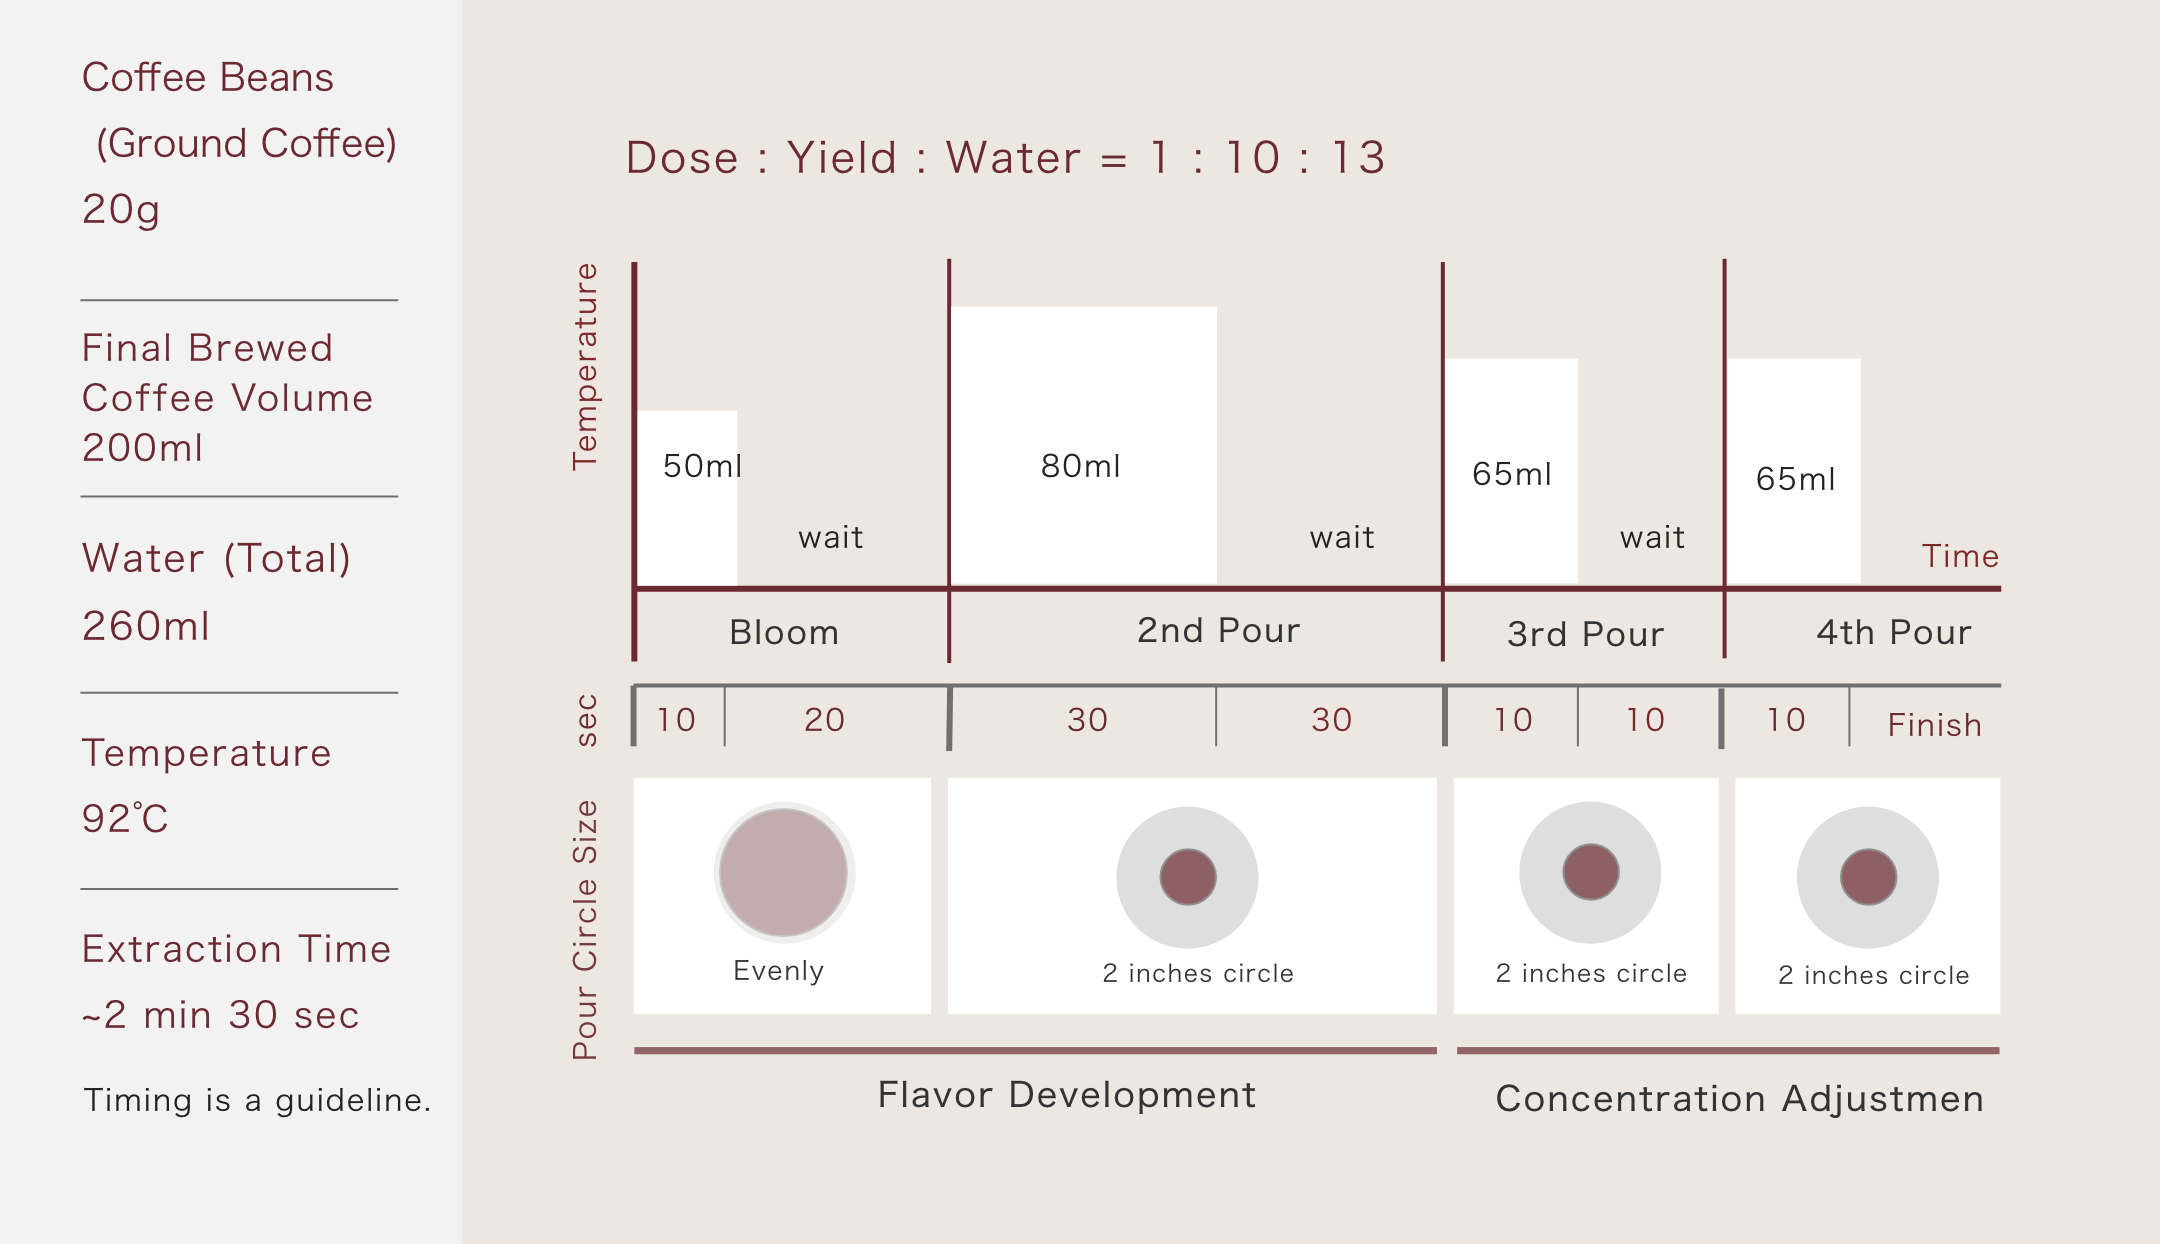

This is the Recipe MAP for the Light–Medium Roast drip coffee brewing method explained below.
It can be applied to coffee beans roasted in the range from Cinnamon Roast to Medium Roast.※Please bookmark this page for a reference.
Target of this recipe
To create a cup where the Mocha-like aroma gently spreads, while maintaining a sense of lightness.
To finish the acidity with a light and refreshing impression.
3. Coffee Beans, Water Amount and Temperature and Grind Size
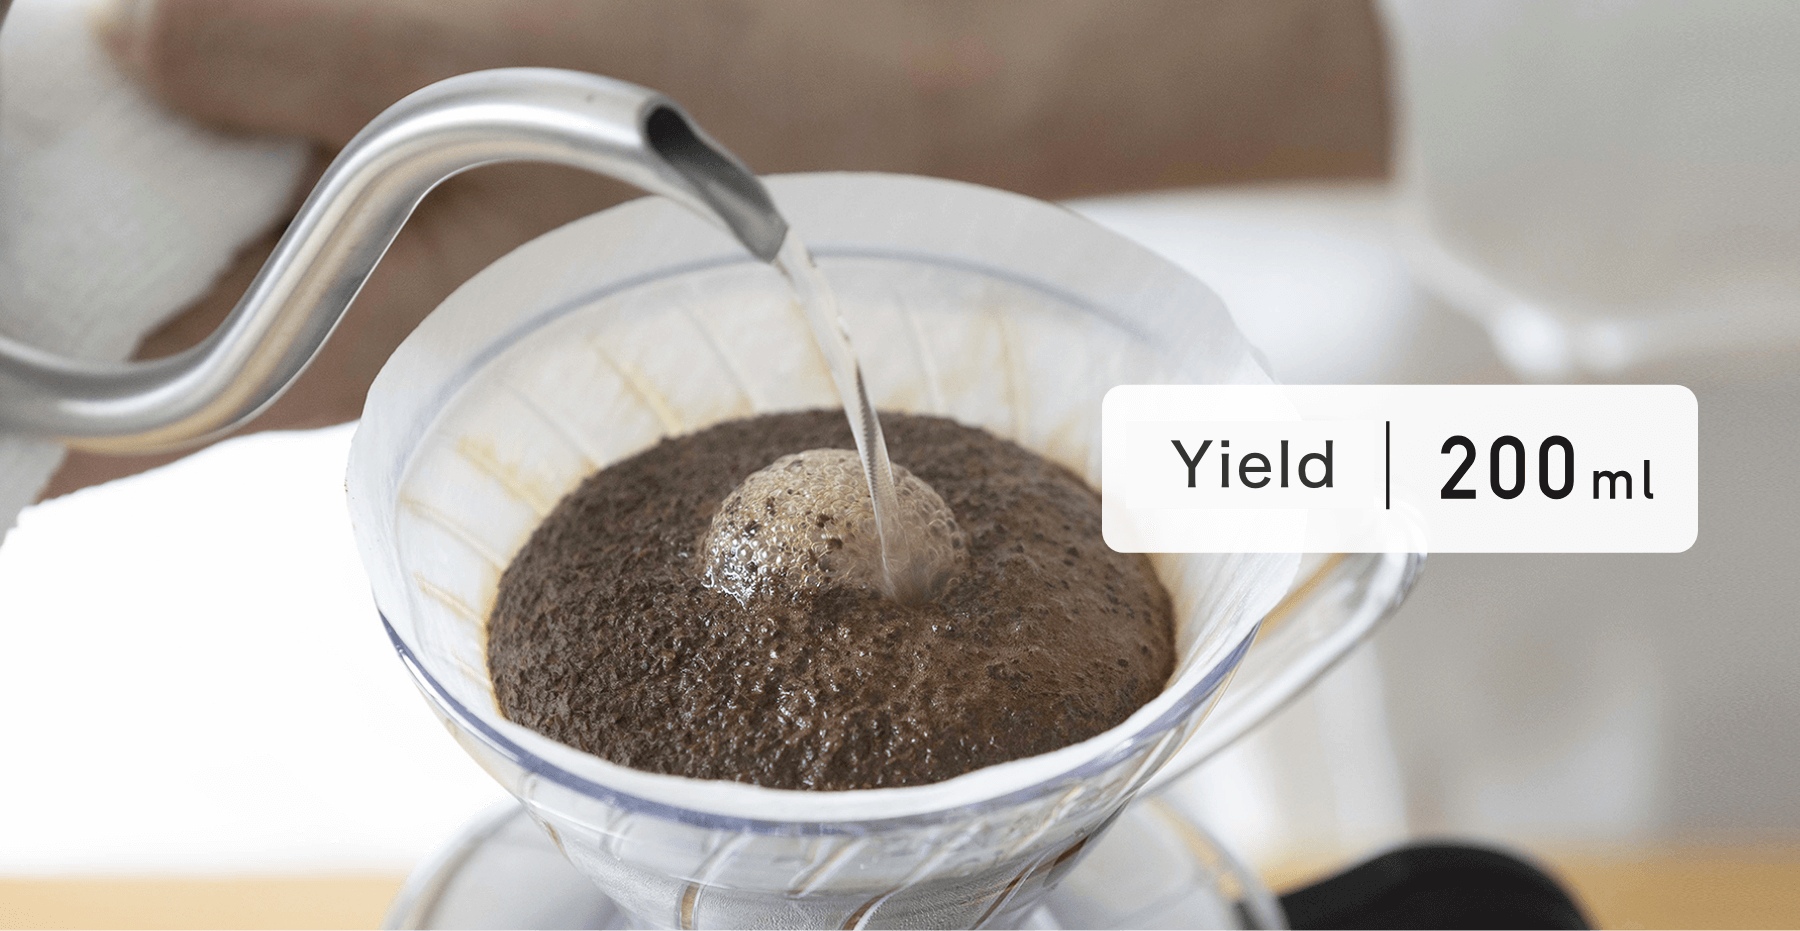
We will brew approximately 200 ml of coffee, which is about one mug.
Below is the required amount of coffee grounds and hot water.
Coffee Amount and Grind Size
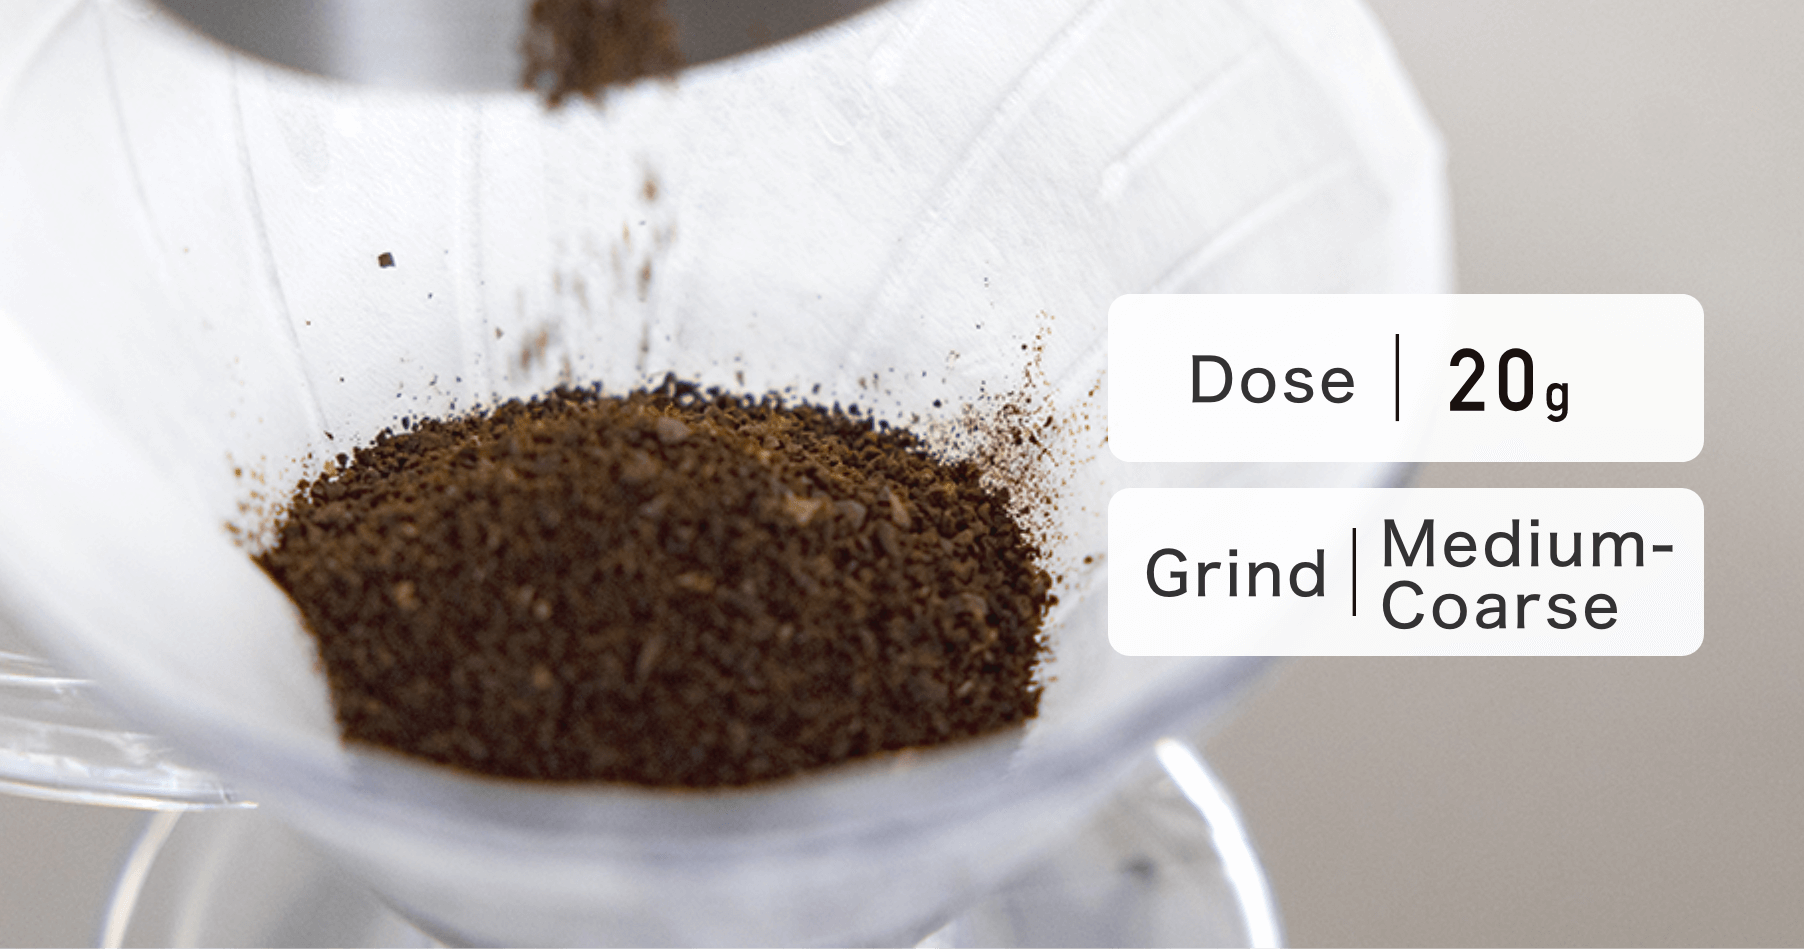
To brew 200 ml of coffee, 20g of coffee beans or grounds.
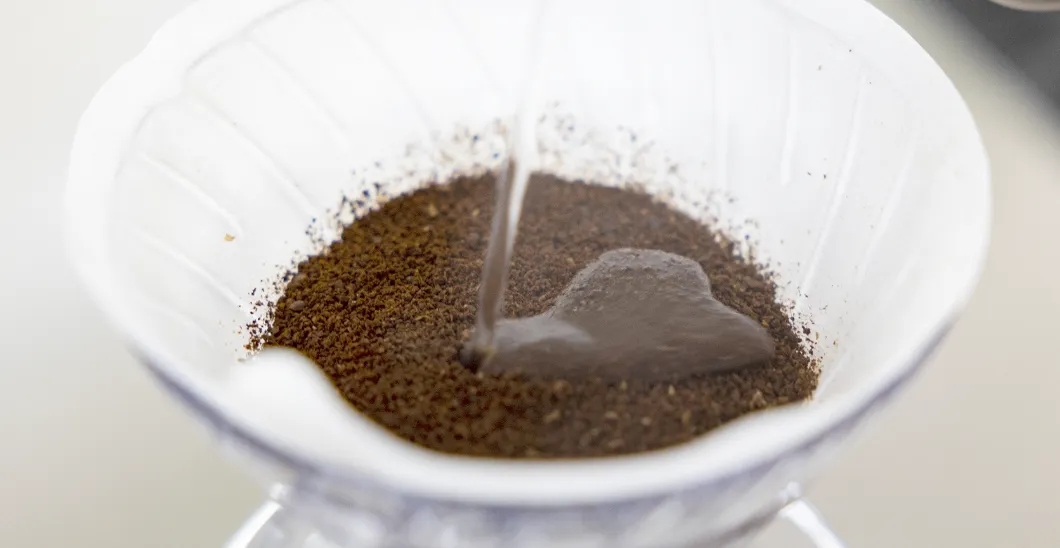
If you purchase whole beans, grind them to a medium-coarse size.
The coarseness should look similar to the example shown in the image.
If you purchase pre-ground coffee, it is typically ground to a medium size, which is also acceptable.
Q. Why use a medium-coarse to medium grind?
A. When the grind is finer, hot water penetrates the coffee grounds more quickly, resulting in a shorter extraction time.
To brew coffee as intended, a certain amount of extraction time is necessary.
By using a medium-coarse grind, the extraction time becomes longer, making it easier to control the flavor.
Water Amount and Water Temperature
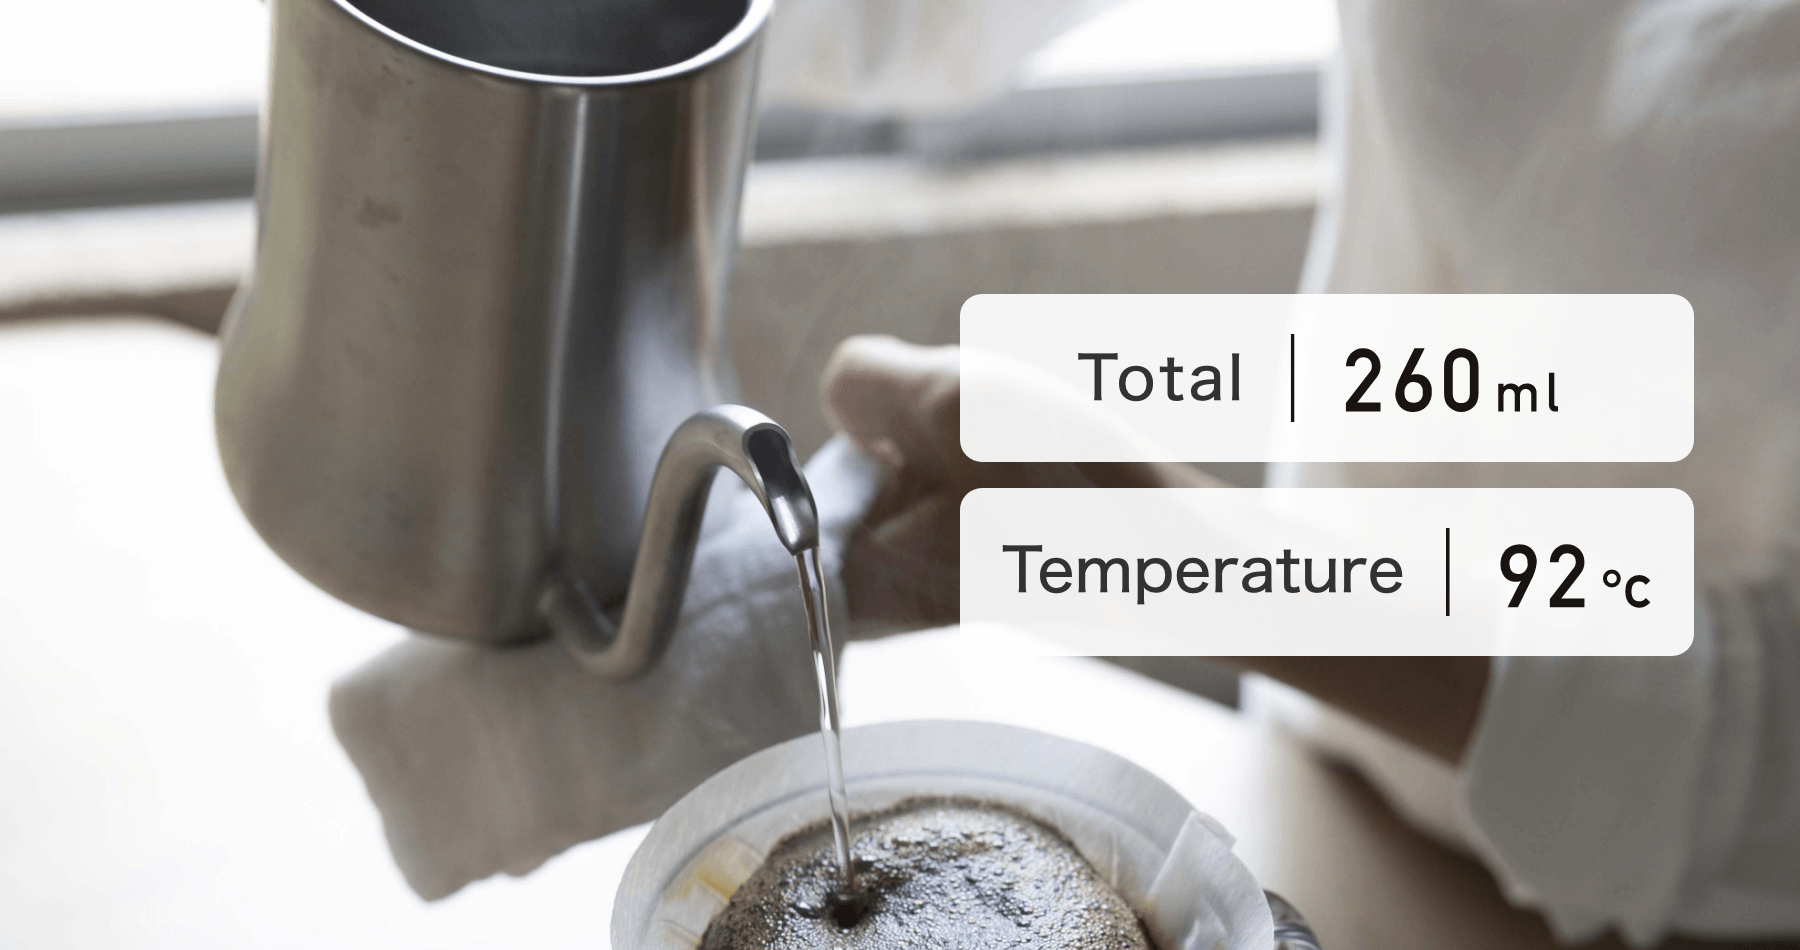
To brew 200 ml of coffee, the total amount of hot water poured is 260 ml
(1.3 times the final brewed volume).
The recommended water temperature for light–medium roast coffee is 92℃ (197F).
If you do not have a thermometer:
・Bring water to a boil in a pot
・Turn off the heat and allow the water to set (after it stops vigorously boiling)
・Pour the required amount of water into a room-temperature kettle (make sure the kettle is not preheated)
Through this process, the water temperature will be approximately around 90°C (194F).
The final brewed coffee temperature will be about 75°C (167F),
a temperature at which you can perceive various flavor elements in a well-balanced way.
Q : Why is the recommended water temperature 92°C(197F)?
A. To enhance the aroma. Aromatic compounds are more pronounced at higher temperatures.
In addition, light–medium roast beans contain more moisture than dark roast beans,
so a slightly warmer water temperature makes it easier to extract the flavors.
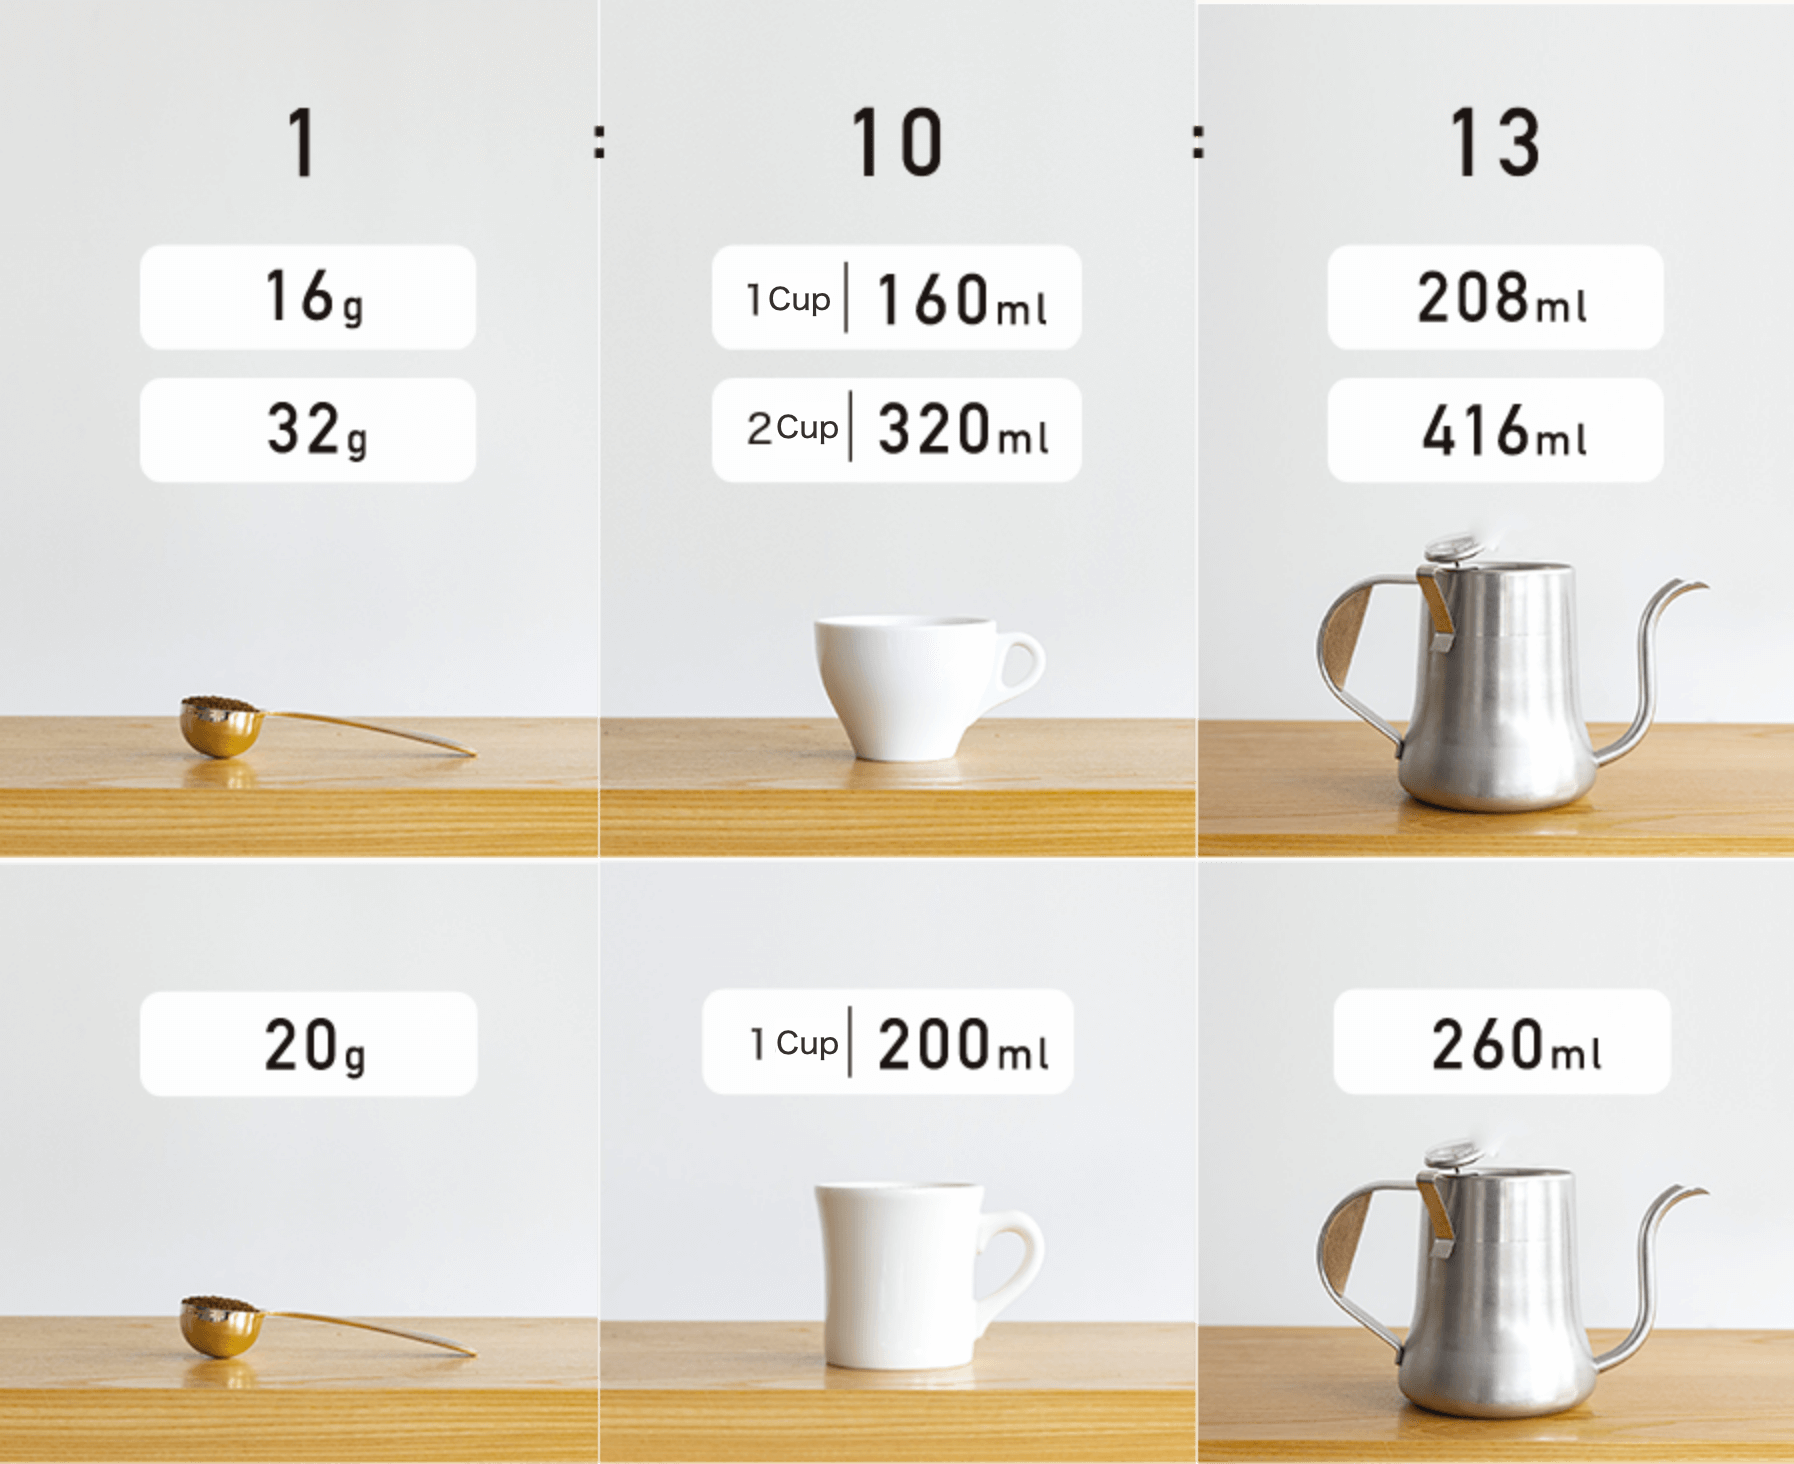
【Quick Tip】Please remember the 1 : 10 : 13 Rule
Have you ever been unsure about how much coffee to use when unexpected guests arrive?
If you remember this rule, you’ll always be prepared.
The ratio of
coffee beans : final brewed coffee : total water poured
is always 1 : 10 : 13
Also, keep in mind that:A standard coffee cup holds about 160ml
A mug cup holds about 200ml
Example:
If you want to brew 320 ml of coffee (equivalent to two coffee cups),
you will need 32 g of coffee beans and 416 ml of hot water.
Note
For specialty coffee, the ratio becomes 0.95:10:13.
Q. How much should the amount of coffee beans be increased as the number of cups increases?
A. Drip coffee is a percolation method, where hot water extracts flavor as it passes through the coffee grounds.
This is different from brewing methods such as tea, where leaves are steeped in water.
By simply multiplying the amount of coffee grounds by the number of servings,
you can consistently brew delicious coffee.
4. Light–Medium Roast Drip Coffee Brewing: 1st Pour / Bloom

Now, let’s begin the extraction.
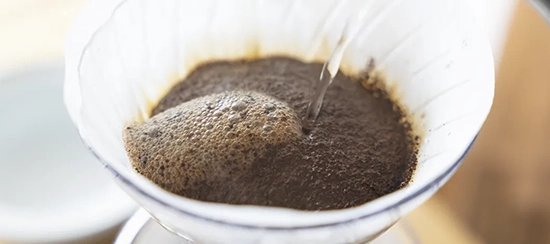
When brewing drip coffee, the first step is blooming.
This process moistens the coffee grounds and prepares them for extraction.
(The water used for blooming is included in the total amount of water.)
1st Pour: Bloom — Water Amount and Time
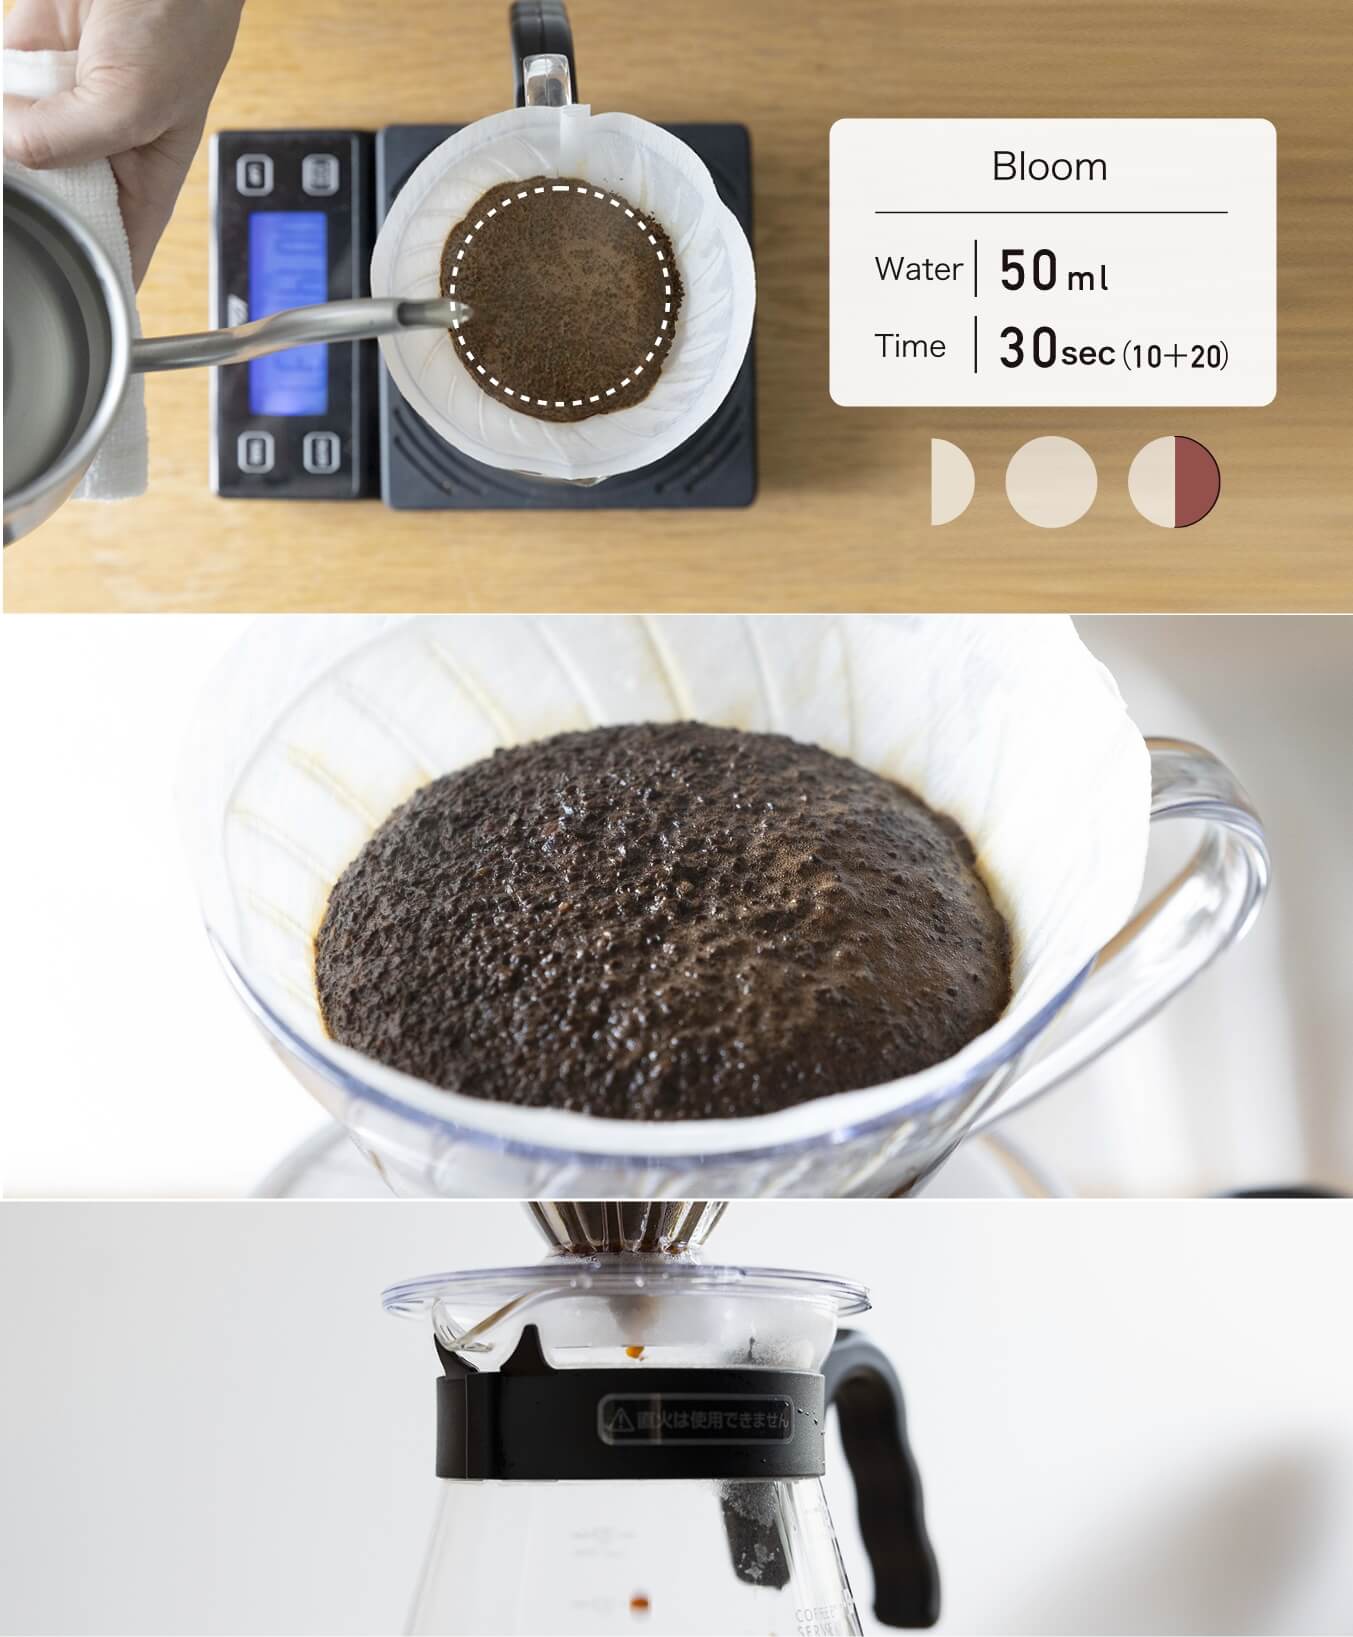
“Blooming”
First, level the coffee grounds evenly inside the filter.
Then, pour hot water evenly over all of the coffee grounds.
As shown in the image (second row), the coffee grounds will swell and begin preparing for extraction.
The amount of water used for blooming is
50ml (50g).
If you do not have a scale,
・Pour until drops begin to fall from the dripper into the server.
At this point, a thin layer of coffee liquid will collect at the bottom of the server.
The blooming time is 30 seconds
( pouring time: approx. 10 seconds / blooming time: 20 seconds as a guideline ).
The entire extraction process takes about 2 minutes and 30 seconds.
Should I wet (rinse) the paper filter before blooming?
A. We recommend rinsing unbleached, brown paper filters.
In some cases, odor removal may not have been done.
For bleached white filters, rinsing is not necessary and does not affect the taste,
but I personally prefer to rinse them anyway.
5. Light–Medium Roast Drip Coffee Brewing: 2nd Pour / Flavor Formation
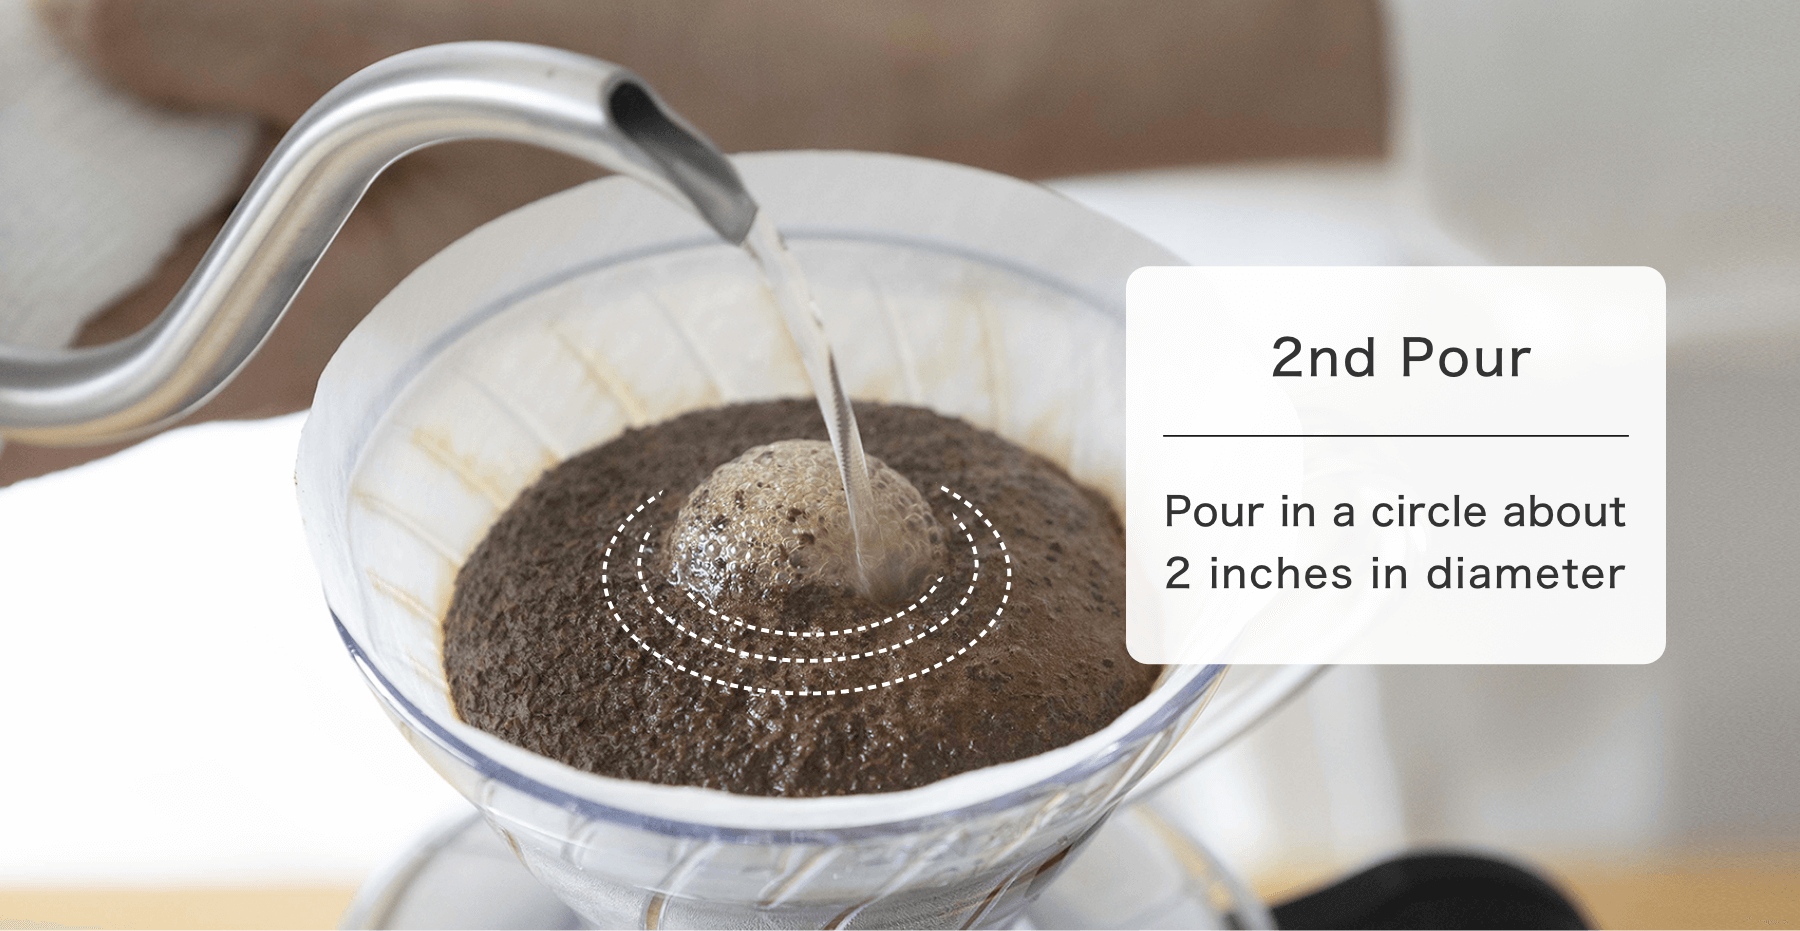
The 2nd pour is the drip that forms the flavor of the coffee.
It extracts the main coffee components.
2nd Pour — Flavor Formation
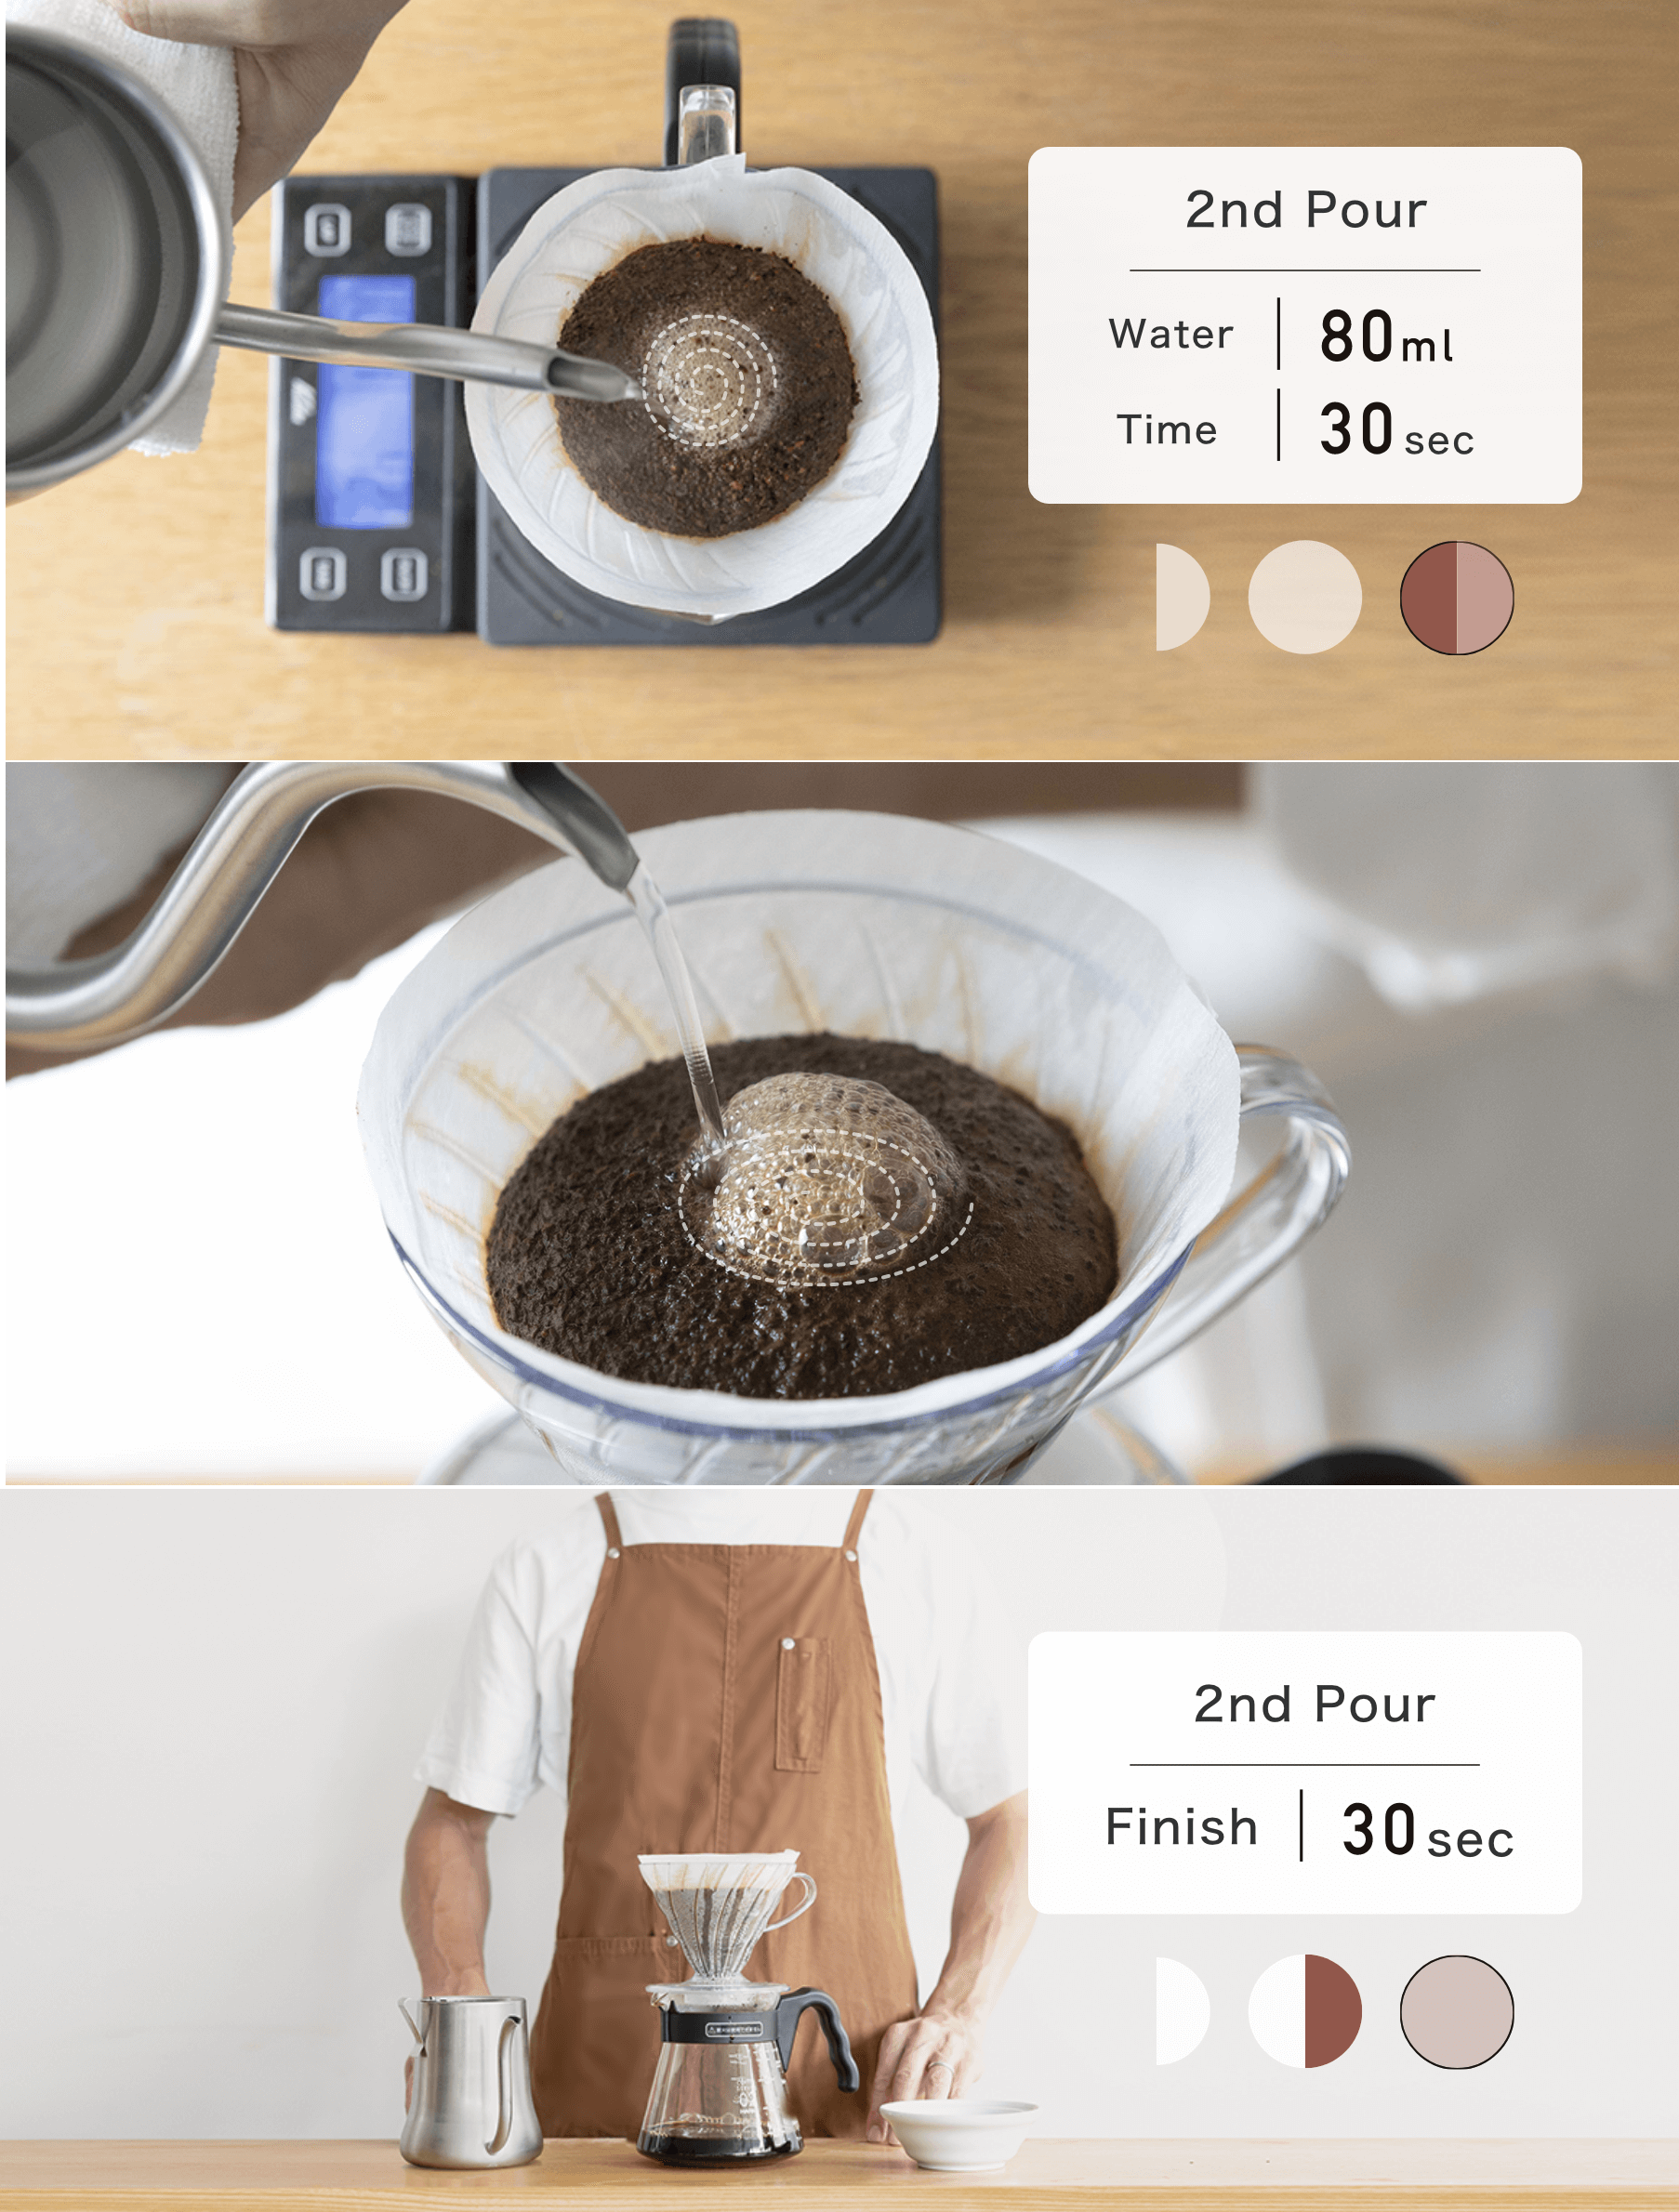
2nd Pour
Aim for the top of the coffee grounds that have bloomed,
and pour hot water in a thin, controlled stream by adjusting the tilt of the kettle.
Move the kettle in a circle about the size of a 2 inches circle
while pouring.
From the center to the outside, and from the outside back to the center — repeat several times.
・Pour 80 ml (80 g) over approximately 30 seconds. This is a relatively slow drip.
・If you do not have a scale, pour until the server reaches approximately 60 ml.
After pouring, wait for the coffee to finish dripping.
The total duration for the 2nd pour is 60 seconds (pouring time = 30 sec / finishing drip = 30 sec).
※Note※
The timing is a guideline. The speed at which the coffee drips may vary depending on the shape of the dripper.
6. Light–Medium Roast Drip Coffee Brewing: 3rd / 4th Pour — Concentration Adjustment
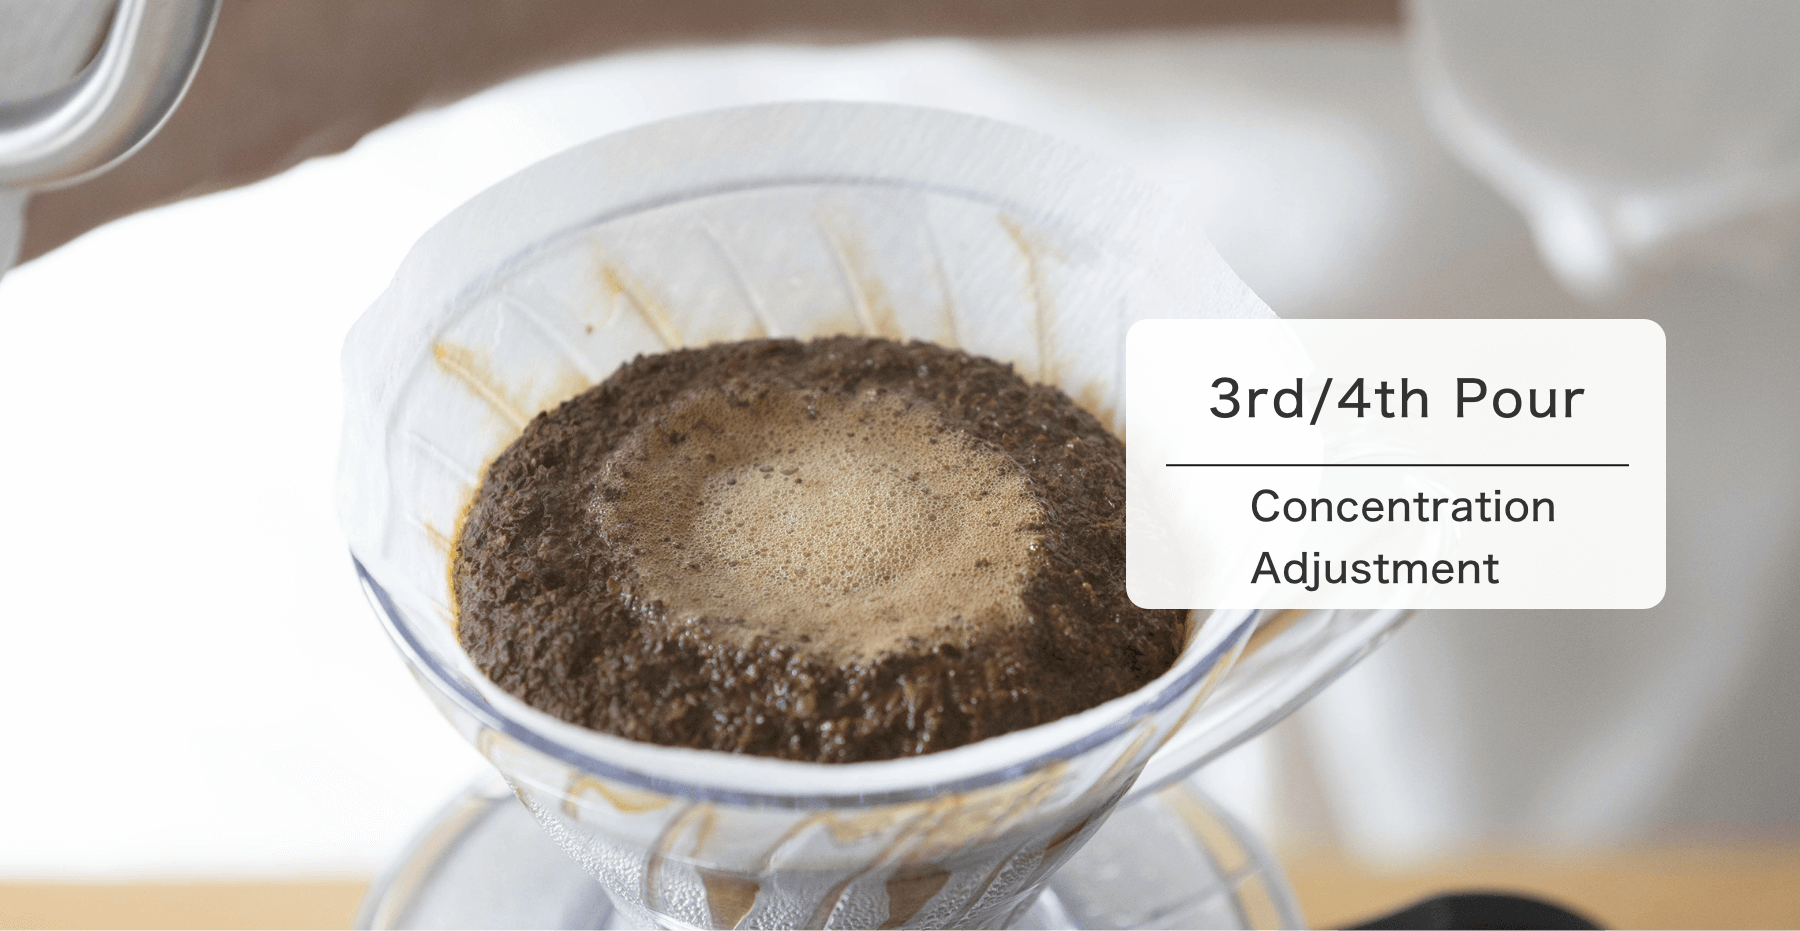
The 3rd and 4th pours are for adjusting the coffee’s concentration.
As with the 2nd pour, pour in a circular motion about a 2-inch circle.
3rd / 4th Pour — Pour Inside 2-inch circle
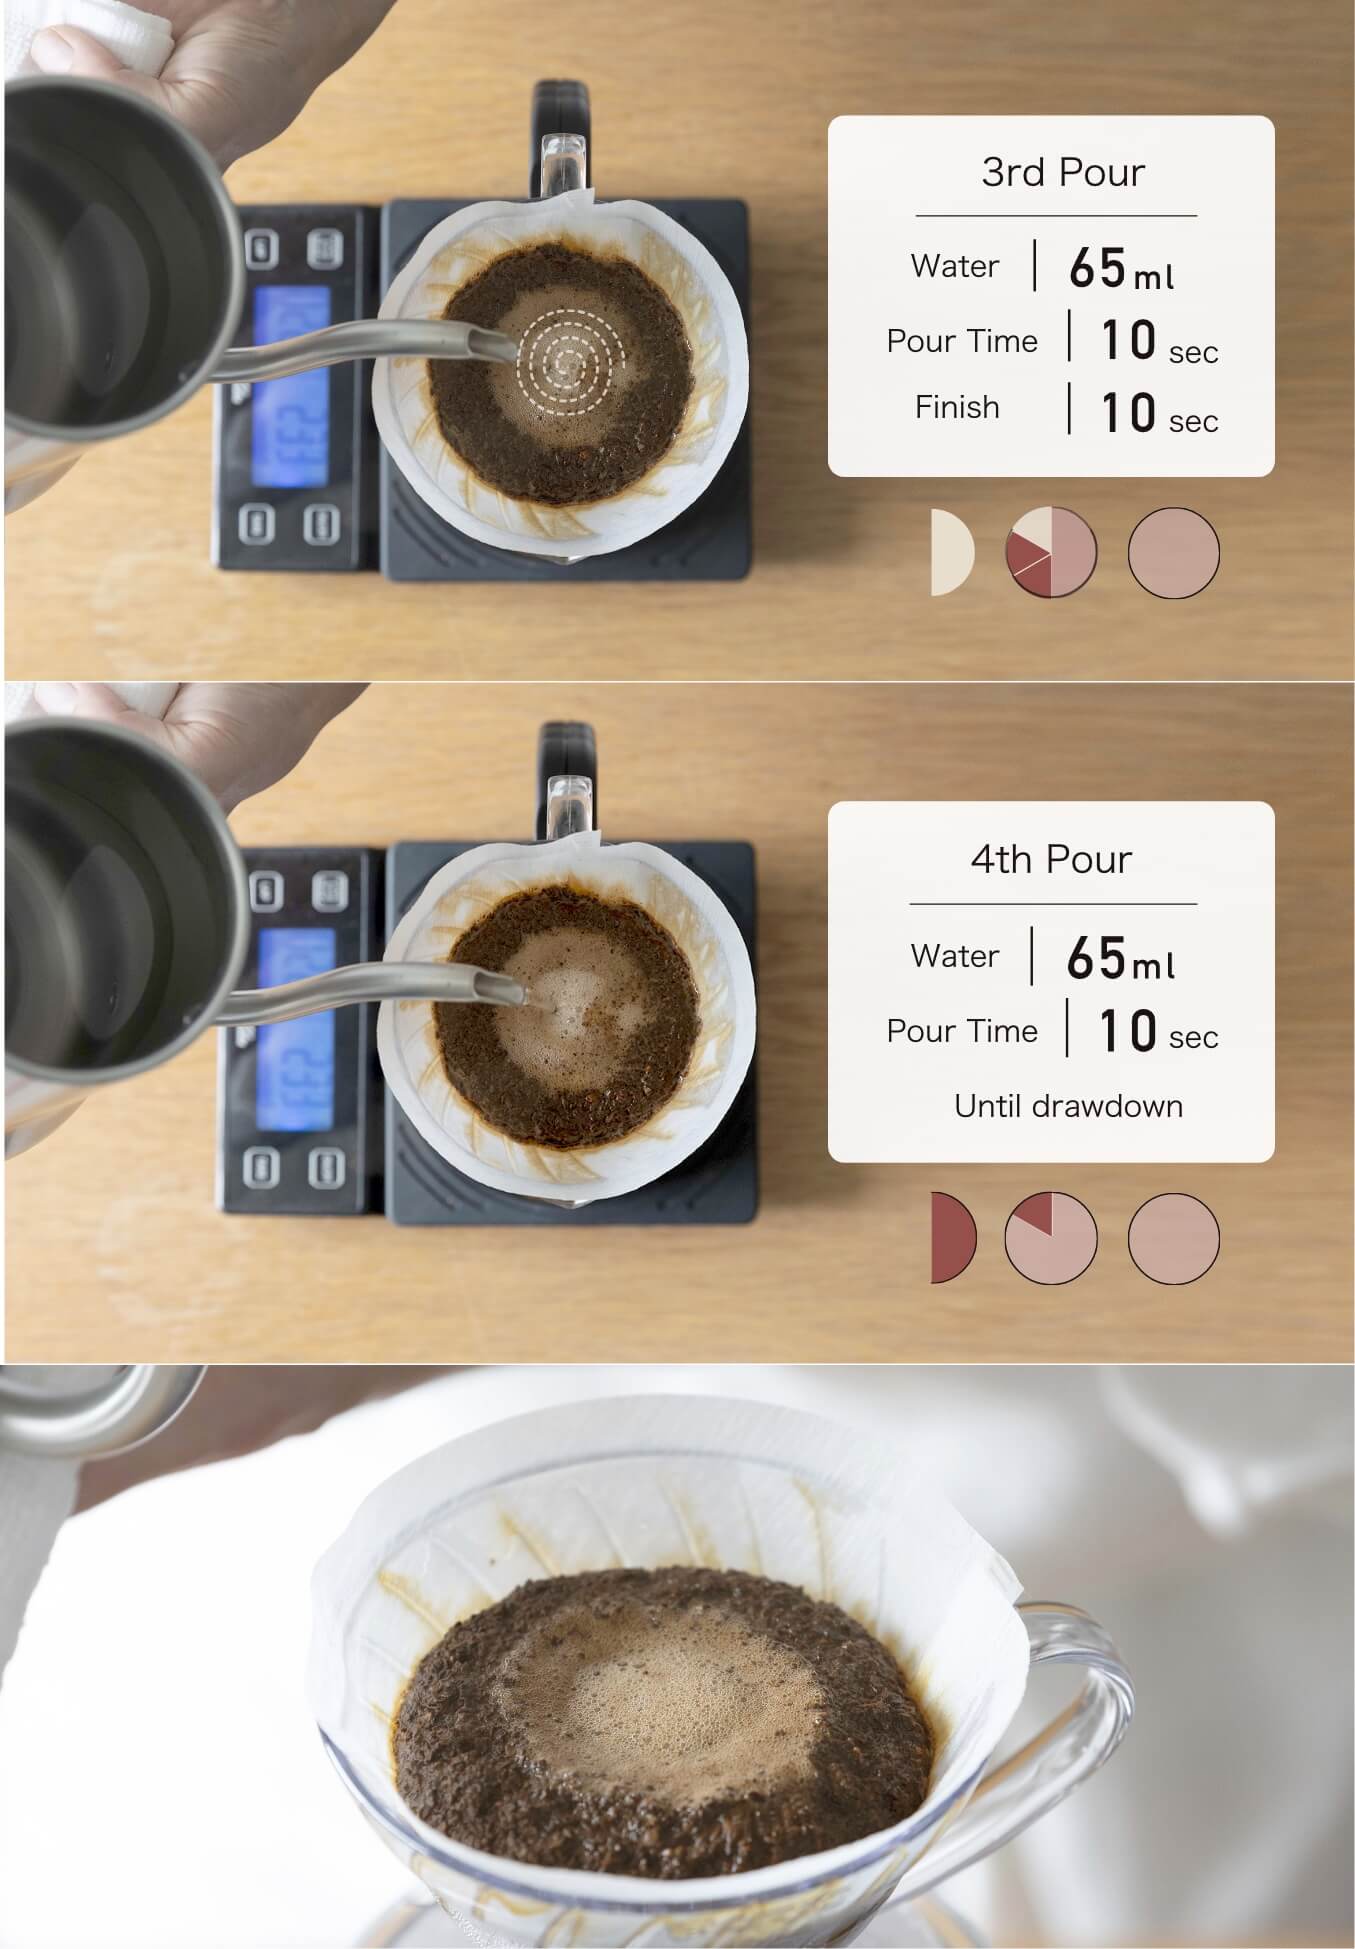
3rd Pour
As with the 2nd pour, pour in a circular motion about 2-inch circle,
pouring 65 ml over approximately 10 seconds.
Compared to the 2nd pour, this is a much faster drip.
Use a slightly thicker stream to increase the pouring speed.
Pouring outside a 2-inch circle may cause uneven extraction or bitterness.
Make sure to pour within the same circle without breaking the “wall” (the raised outer edge formed during the 2nd pour).
After pouring 65 ml, wait for the coffee to finish dripping.
The total process for the 3rd pour is 20 seconds (pouring time ≈ 10 sec / waiting ≈ 10 sec).
※Note※
Timing is a guideline. The dripping speed may vary depending on the shape of the dripper.
4th Pour
As with the 3rd pour, pour 65 ml at the same speed into a 2-inch circle.
Once all 260 ml has been poured,
wait for the coffee to finish dripping to complete the light–medium roast hand drip!
Q. Common Question About Hand Drip — Finishing the Drip
A. A frequently asked question is whether to let all the coffee in the dripper finish dripping or to lift the dripper.
The answer depends on the extraction time.
As the drip proceeds, the coffee components are extracted in the order of acidity → sweetness → bitterness → off-flavors.
The correct approach is to let the coffee finish dripping before the off-flavors are extracted.
If it does not finish dripping in time, lift the dripper.
7. How to Brew Without Excess Acidity and Its Mechanism
Many people enjoy light to medium roast coffee but dislike it when it tastes too sour.
First, let’s discuss why acidity can become pronounced.
◉ Are your coffee beans fresh?
Old, oxidized beans produce not only sourness but also various unpleasant flavors.
Use beans that are 2–3 weeks from the roast date.
◉ Were the beans roasted with flavor balance in mind?
To bring out a gentle acidity, it is important to balance sweetness and bitterness.
Choose beans roasted carefully by a roaster close to the roasting machine.
◉ Brew using a hand drip
The pouring method can help control acidity. This will be explained in the next chapter.
Why Acidity Can Become Over-Extracted
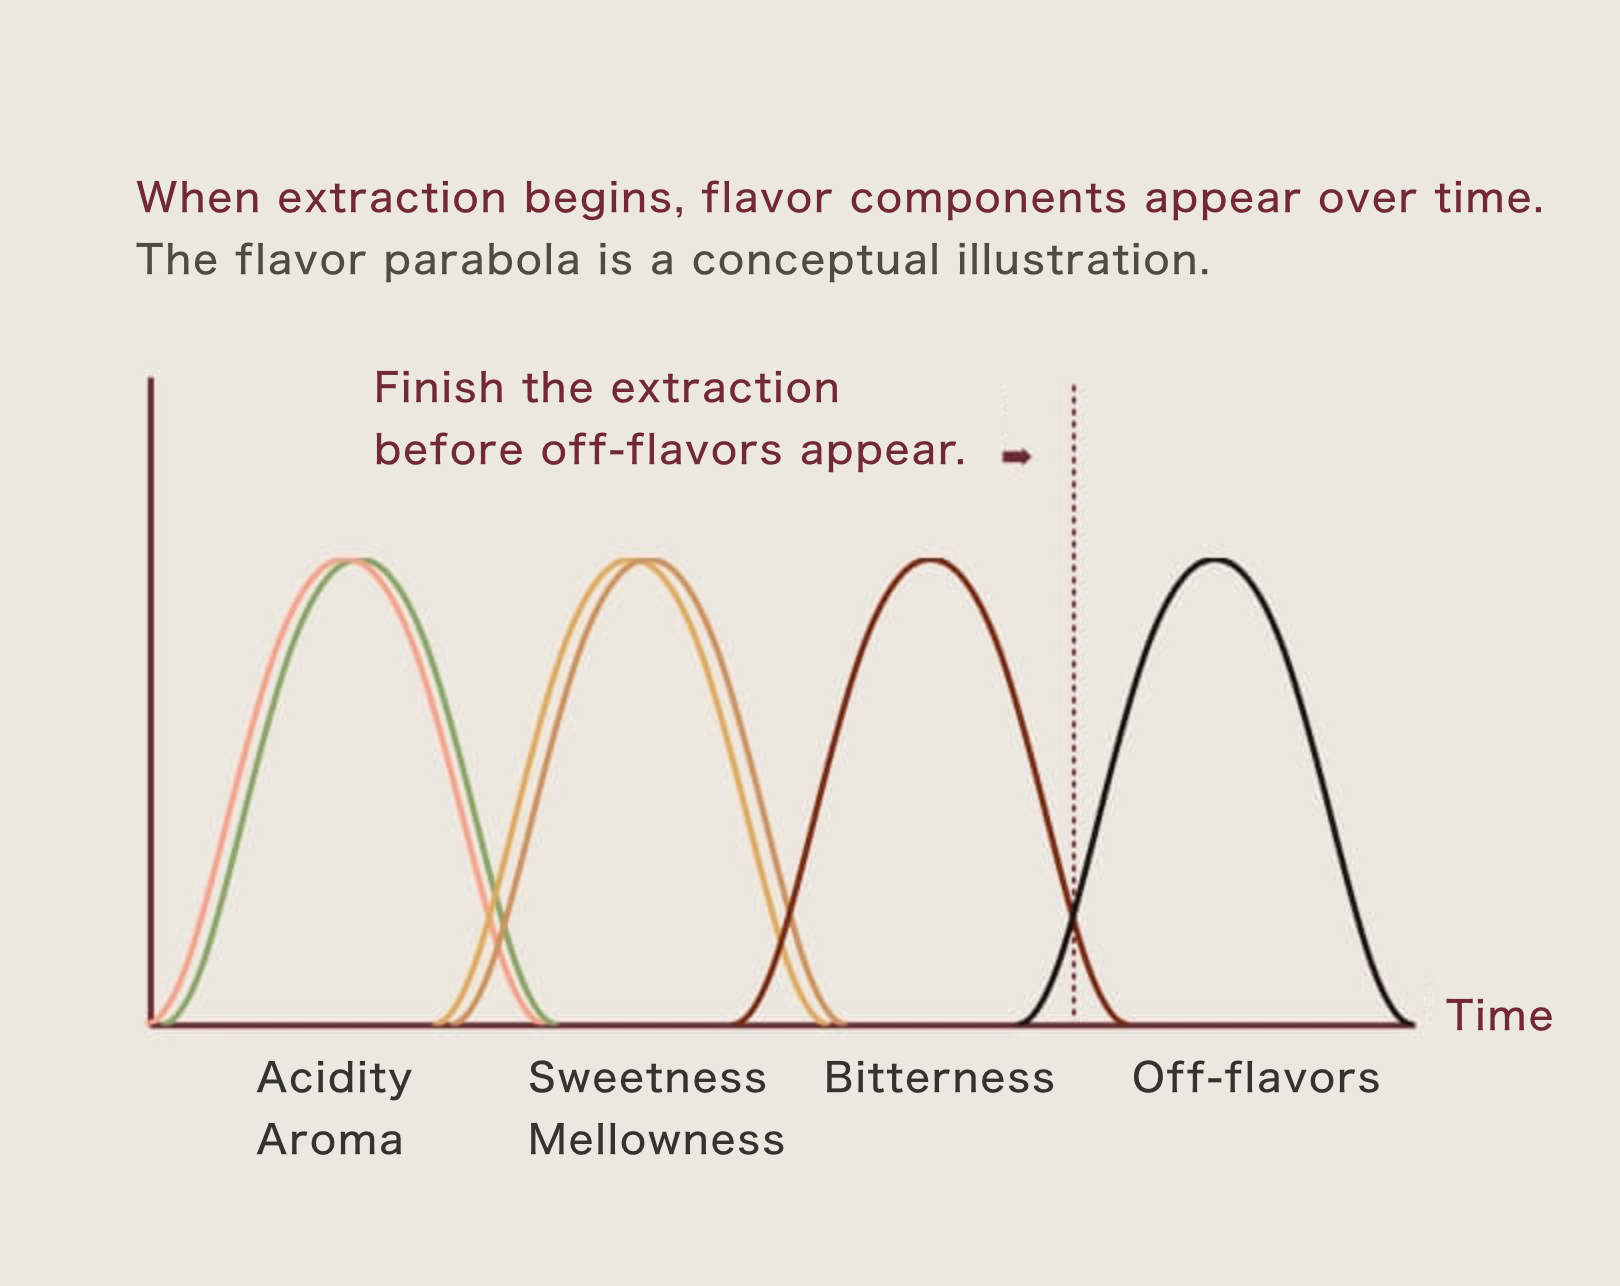
When you start the drip, coffee components appear in the following order:
acidity & aroma → sweetness & mellowness → bitterness → off-flavors.
If you drip light–medium roast beans in the same way you would with medium roast beans,
the acidity can become over-emphasized.
To control acidity, pour less water during the period when acidity is extracted,
and pour more water during the periods when sweetness and bitterness are extracted.
Comparison of Water Amounts Between Light–Medium and Medium Roast Recipes
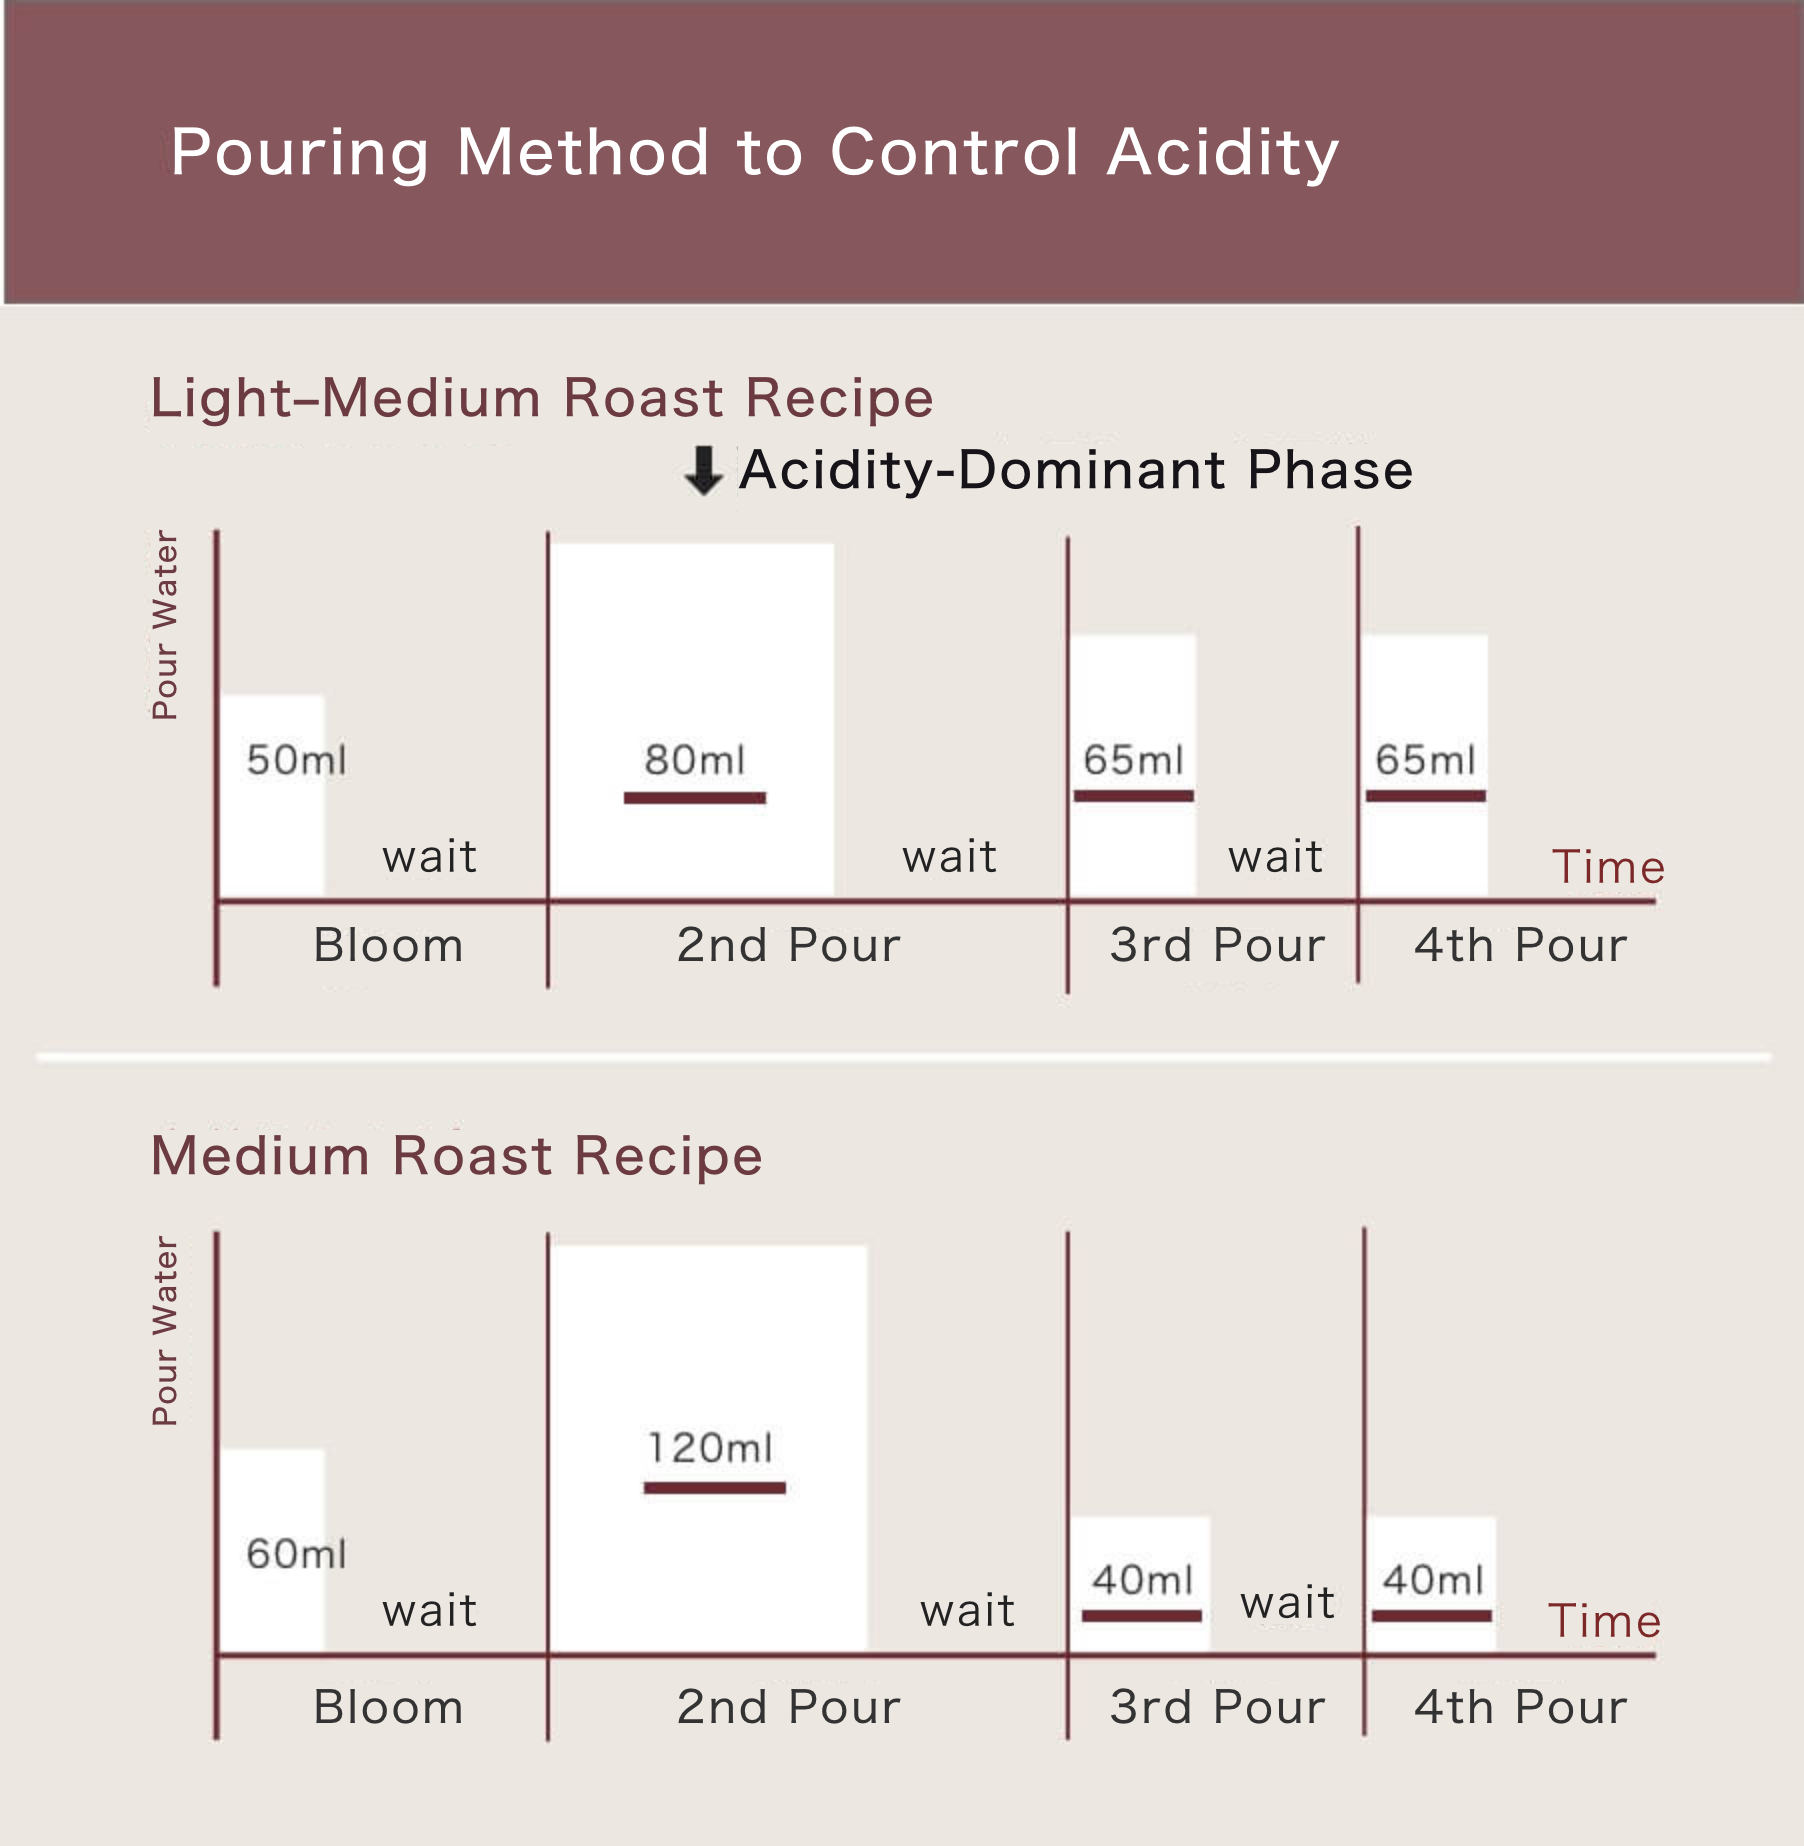
Compare the Light–Medium Roast Recipe MAP above with the Medium Roast Recipe MAP from the same series.
2nd Pour (Acidity Phase): Medium Roast 120 ml : Light–Medium Roast 80 ml
3rd / 4th Pour (Sweetness / Bitterness Phase): Medium Roast 40 ml : Light–Medium Roast 65 ml
[Ethiopia Mocha Natural] 400g ¥2,720
The discount rate varies depending on the purchase weight — this is a scale merit system.
Delivery up to 500g is via Kuroneko Yamato (NekoPos) / Flat rate 330 yen nationwide (excluding remote islands).
For purchases over 3,000 yen, you can use a 1,000 yen coupon by registering on LINE for the first time.
Hand drip opens up the world of coffee.

We hope that the techniques explained in this article on how to brew light–medium roast hand drip coffee were helpful.
The key points are:
Enhance the aroma with a slightly higher water temperature, keep the 2nd pour relatively low, and pour more for the 3rd and 4th pours — balancing the flavor while controlling acidity. That’s the general idea.
I believe coffee is a very personal beverage.
Someone else’s negative experience is not necessarily yours.
Experiment with various hand drip methods,
and discover your own light–medium roast coffee.
Masami Mitsumoto
Tokusuyama Coffee Boy Co., Ltd. — Tasting Manager / Hikari Store Manager
13th place in the finals of the 2017 Japan Hand Drip Championship, organized by the Specialty Coffee Association of Japan
[Light–Medium Roast] Hand Drip Coffee Recipe MAP – Summary
Light–Medium Roast Straight Coffee
Hand Drip Recipe Summary
| ○Final Coffee Volume | -200ml |
| ○Coffee Grounds | -20g / Medium-Coarse Grind |
| ○Water Volume / Temperature | -260ml / 92℃ |
| ○Total Brewing Time | -Approx. 2 min 30 sec |
| ●1st Pour 【 Bloom 】 | |
| Water Volume | -50ml |
| Time | -30 sec (Pouring ≈10 sec + Bloom ≈20 sec) |
| If No Scale | -Pour until drops fall to the server |
| ●2nd Pour 【 Flavor Extraction 】 | |
| Water Volume | -80ml |
| Pouring Range / Pour Circle | -About 2-inch circle |
| Time | -Approx. 60 sec (from start of pour until complete) |
| If No Scale | -Pour until the coffee in the server reaches about 60ml |
| ●3rd / 4th Pour 【 Adjusting Concentration 】 | |
| Water Volume | -65ml each |
| Pouring Range / Pour Circle | -About the size of 2-inch circle |
| Time | -Approx. 20 sec (from start of pour until complete) |
| If No Scale | -3rd pour: until the server reaches about 130ml 4th pour: until fully dripped |
中浅煎りの穏やかな酸味を引き出すレシピで、
美味しく抽出できる3種の豆を紹介。
2720円 / 送料330円
2400円 / 送料無料
2060円 / 定価の30%オフ/ 送料330円
2600円 / 送料330円
コーヒーを楽しむブログ
もう一歩先のコーヒーを楽しみたい方へ
役立つメディアです。